
Two simple Fresh appetisers & Spring setting

Despite we are only in February, I couldn’t help myself and pot a few spring arrangements to bring a degree of loveliness into the house. I potted some ivy and deep purple crocus into my main french cast iron vase and individual crocus into separate little pots. I personally think spilling plants like ivy, always add a wild carefree feeling to the arrangement. The latter pots being so small, the tiny crocus bulbs are the perfect size for these. I also added a little bit of moss on the edges for a more natural finish. I couldn’t help and buy a few pots of herbs; some lemon thyme and rosemary and a fresh bouquet of tulips, as they are back in season. Usually after the Christmas season is over, I have an urge to cleanse the house, declutter and make everything light and airy. Immediately after the festive season, I am ready for Spring to arrive that is very wishful thinking, since I live in Finland. I’m happy, days are longer and lighter now which makes me crave for more fresh types of foods. Two easy and simple appetisers that I made last week were endive leaves in caesar salad dressing & slow roasted tomatoes with buffalo mozzarella. Both extremely simple and elegant.


Two simple appetisers : Endive leaves in casear salad dressing & slow roasted tomatoes with buffalo mozzarella


Endive leaves in caesar salad dressing
Endive leaves are a lovely yet simple way to elevate your casual salad giving it that crisp and bitter taste. The creamy garlic infused caesar salad dressing softens the flavour leaving a refined and interesting aftertaste. This takes a few minutes to make and adds a little spring to the house, despite us being only in February.
Ingredients
1/2 garlic cloves (depending on how much garlic you like)
2 anchovies in oil
small handful (15g) of grated parmesan
5 tbsp mayonnaise
1 tbsp lemon juice
Finely grate the garlic, then mash in the anchovies – you can also do this with the edge of a knife on a chopping board. Spoon into a bowl and finely grate in the parmesan, then stir in the mayonnaise and dijon and a little bit of lemon juice. For this recipe, I also toasted a bunch of almond flakes on a dry pan for a bit of extra crunch. Garnish with lots of black pepper.
Slow roasted tomatoes with buffalo mozzarella
Another wonderfully simple appetiser is a good quality buffalo mozzarella (or burrata, which is even better) paried with oven roasted tomatoes.
Ingridents (serves 2)
4-5 tomatoes sliced into quarters
2 whole buffalo mozzarellas
Olive oil/salt/pepper/thyme
Preheat oven to 150˚C.
Line an oven tray with baking paper and spread tomatoes out on it.
Drizzle with oil and sprinkle with salt, pepper and sugar (optional). Add a few herbs on top like thyme or rosemary
Bake for 1 1/4 hours or until slightly shrivelled.
Serve when slightly warm with an entire ball of mozzarella. Drizzle extra oil on top, a sprinkling of salt and pepper and a few twigs of thyme.

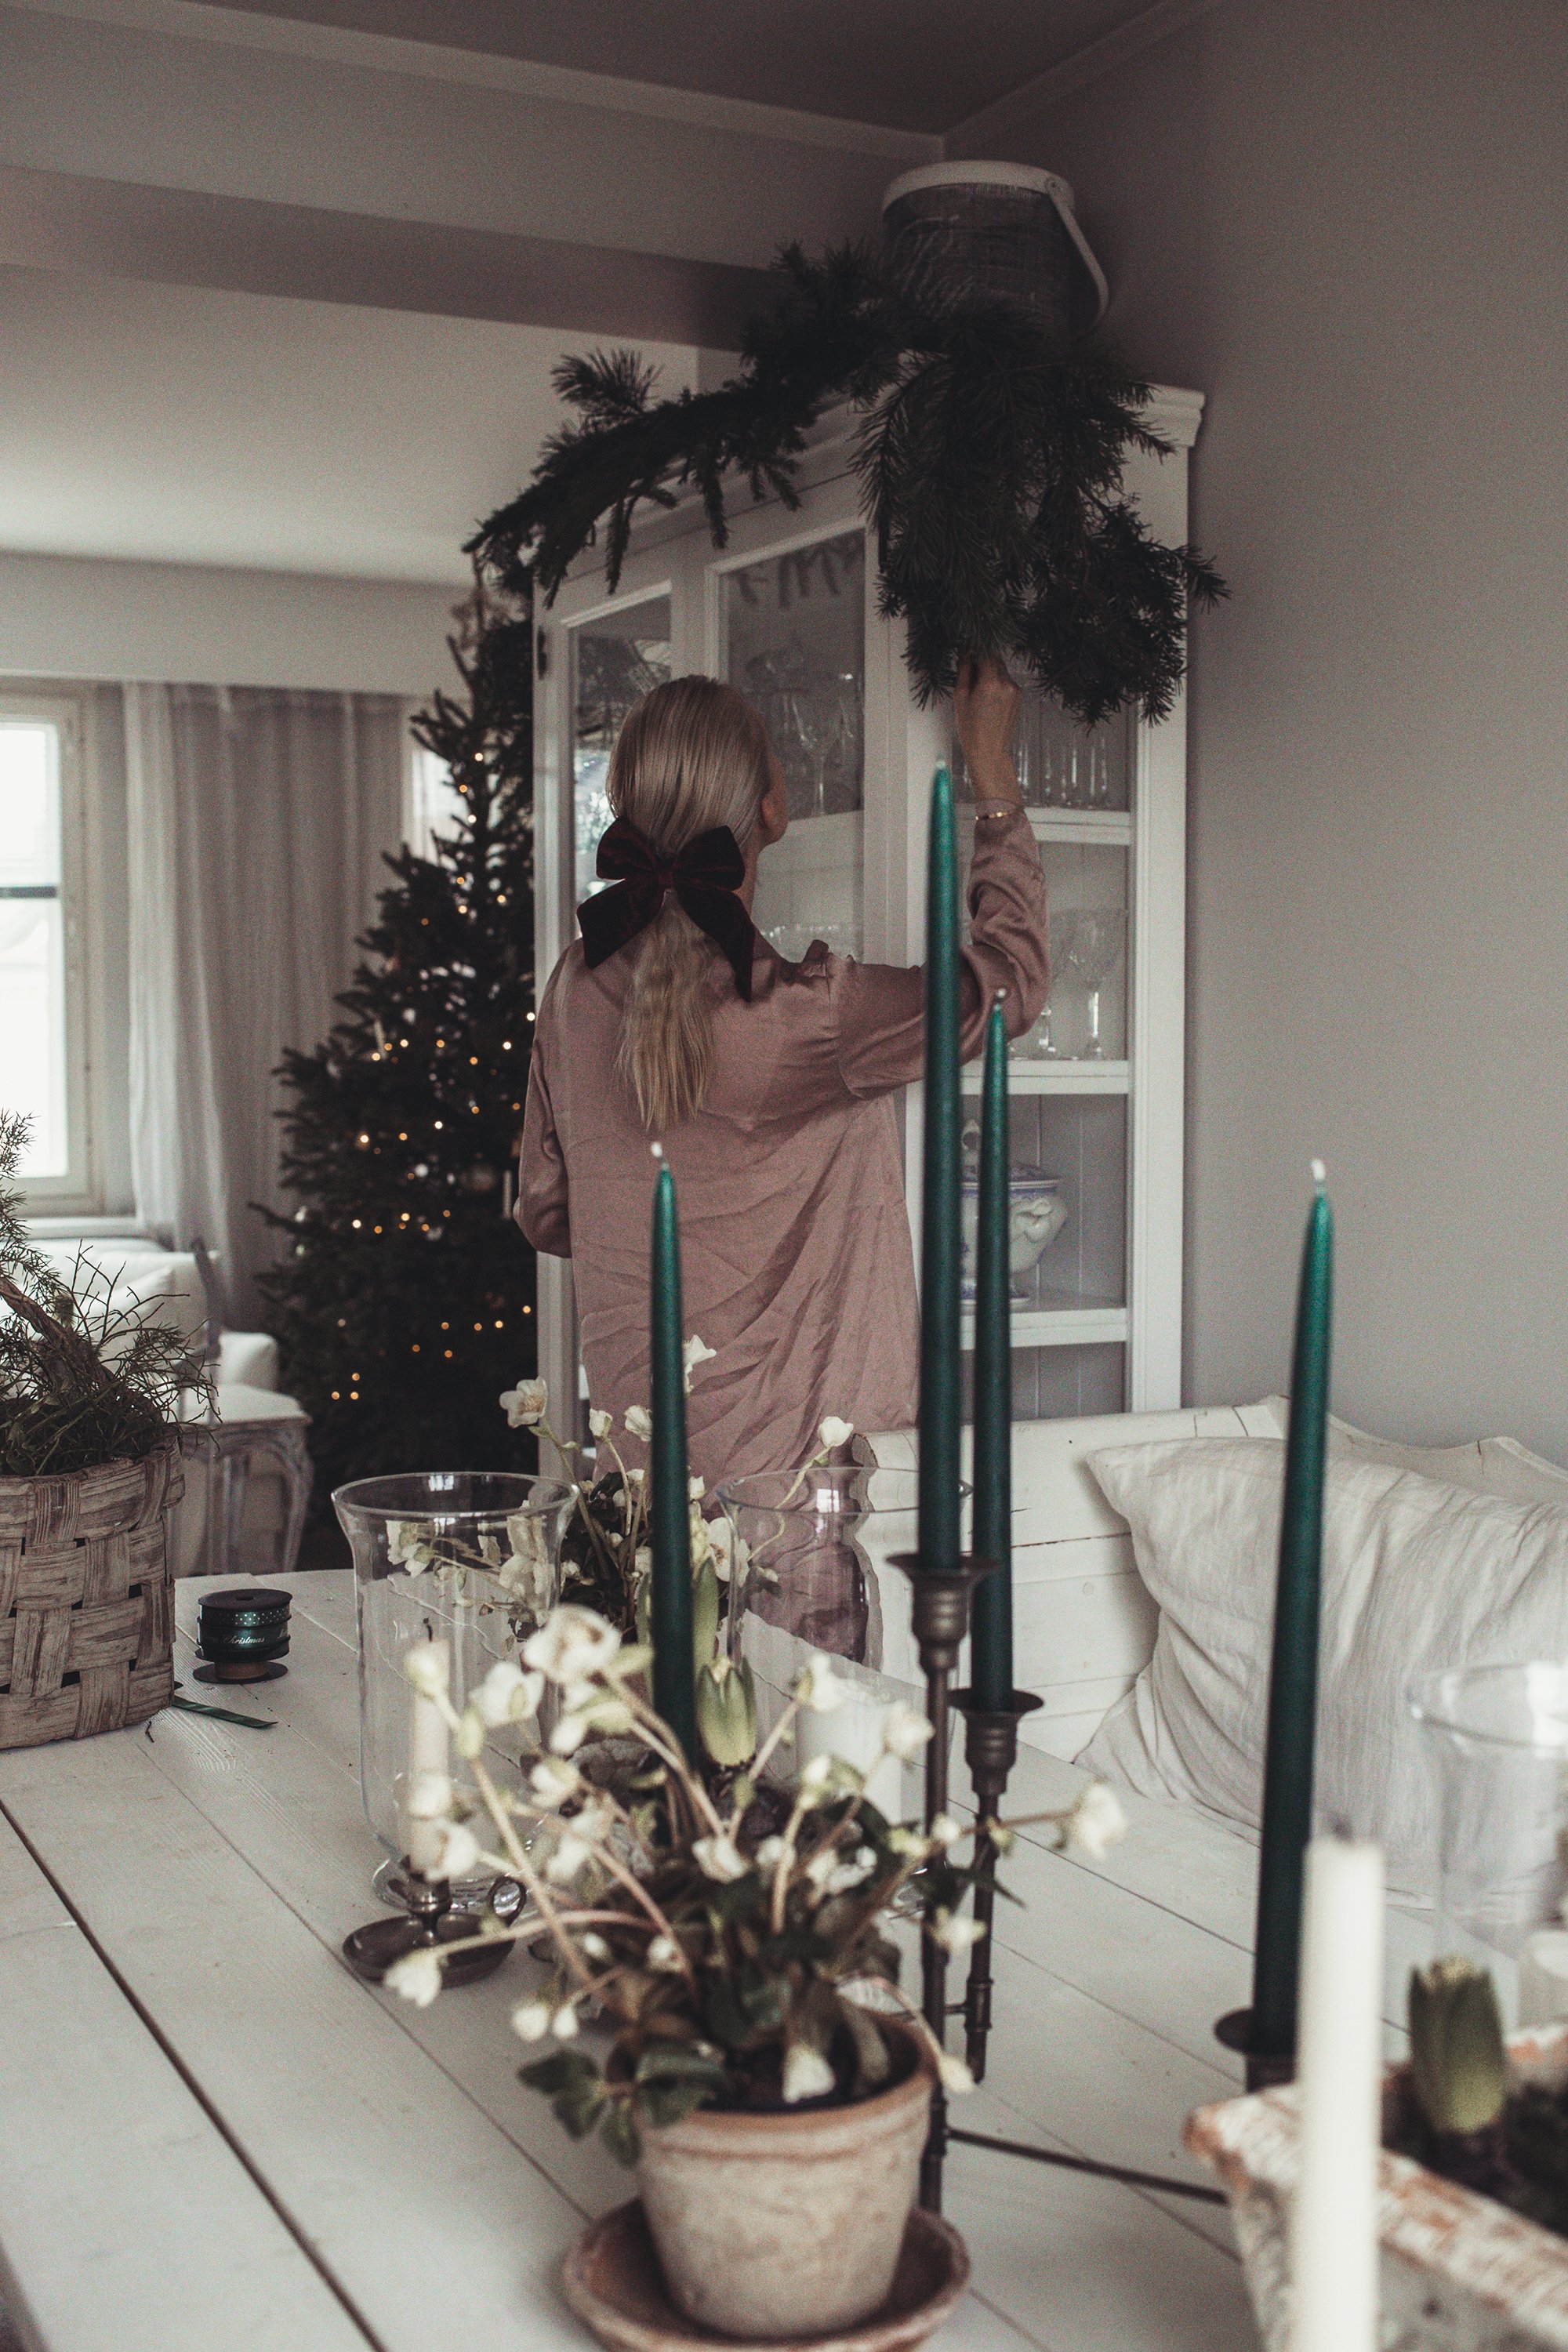
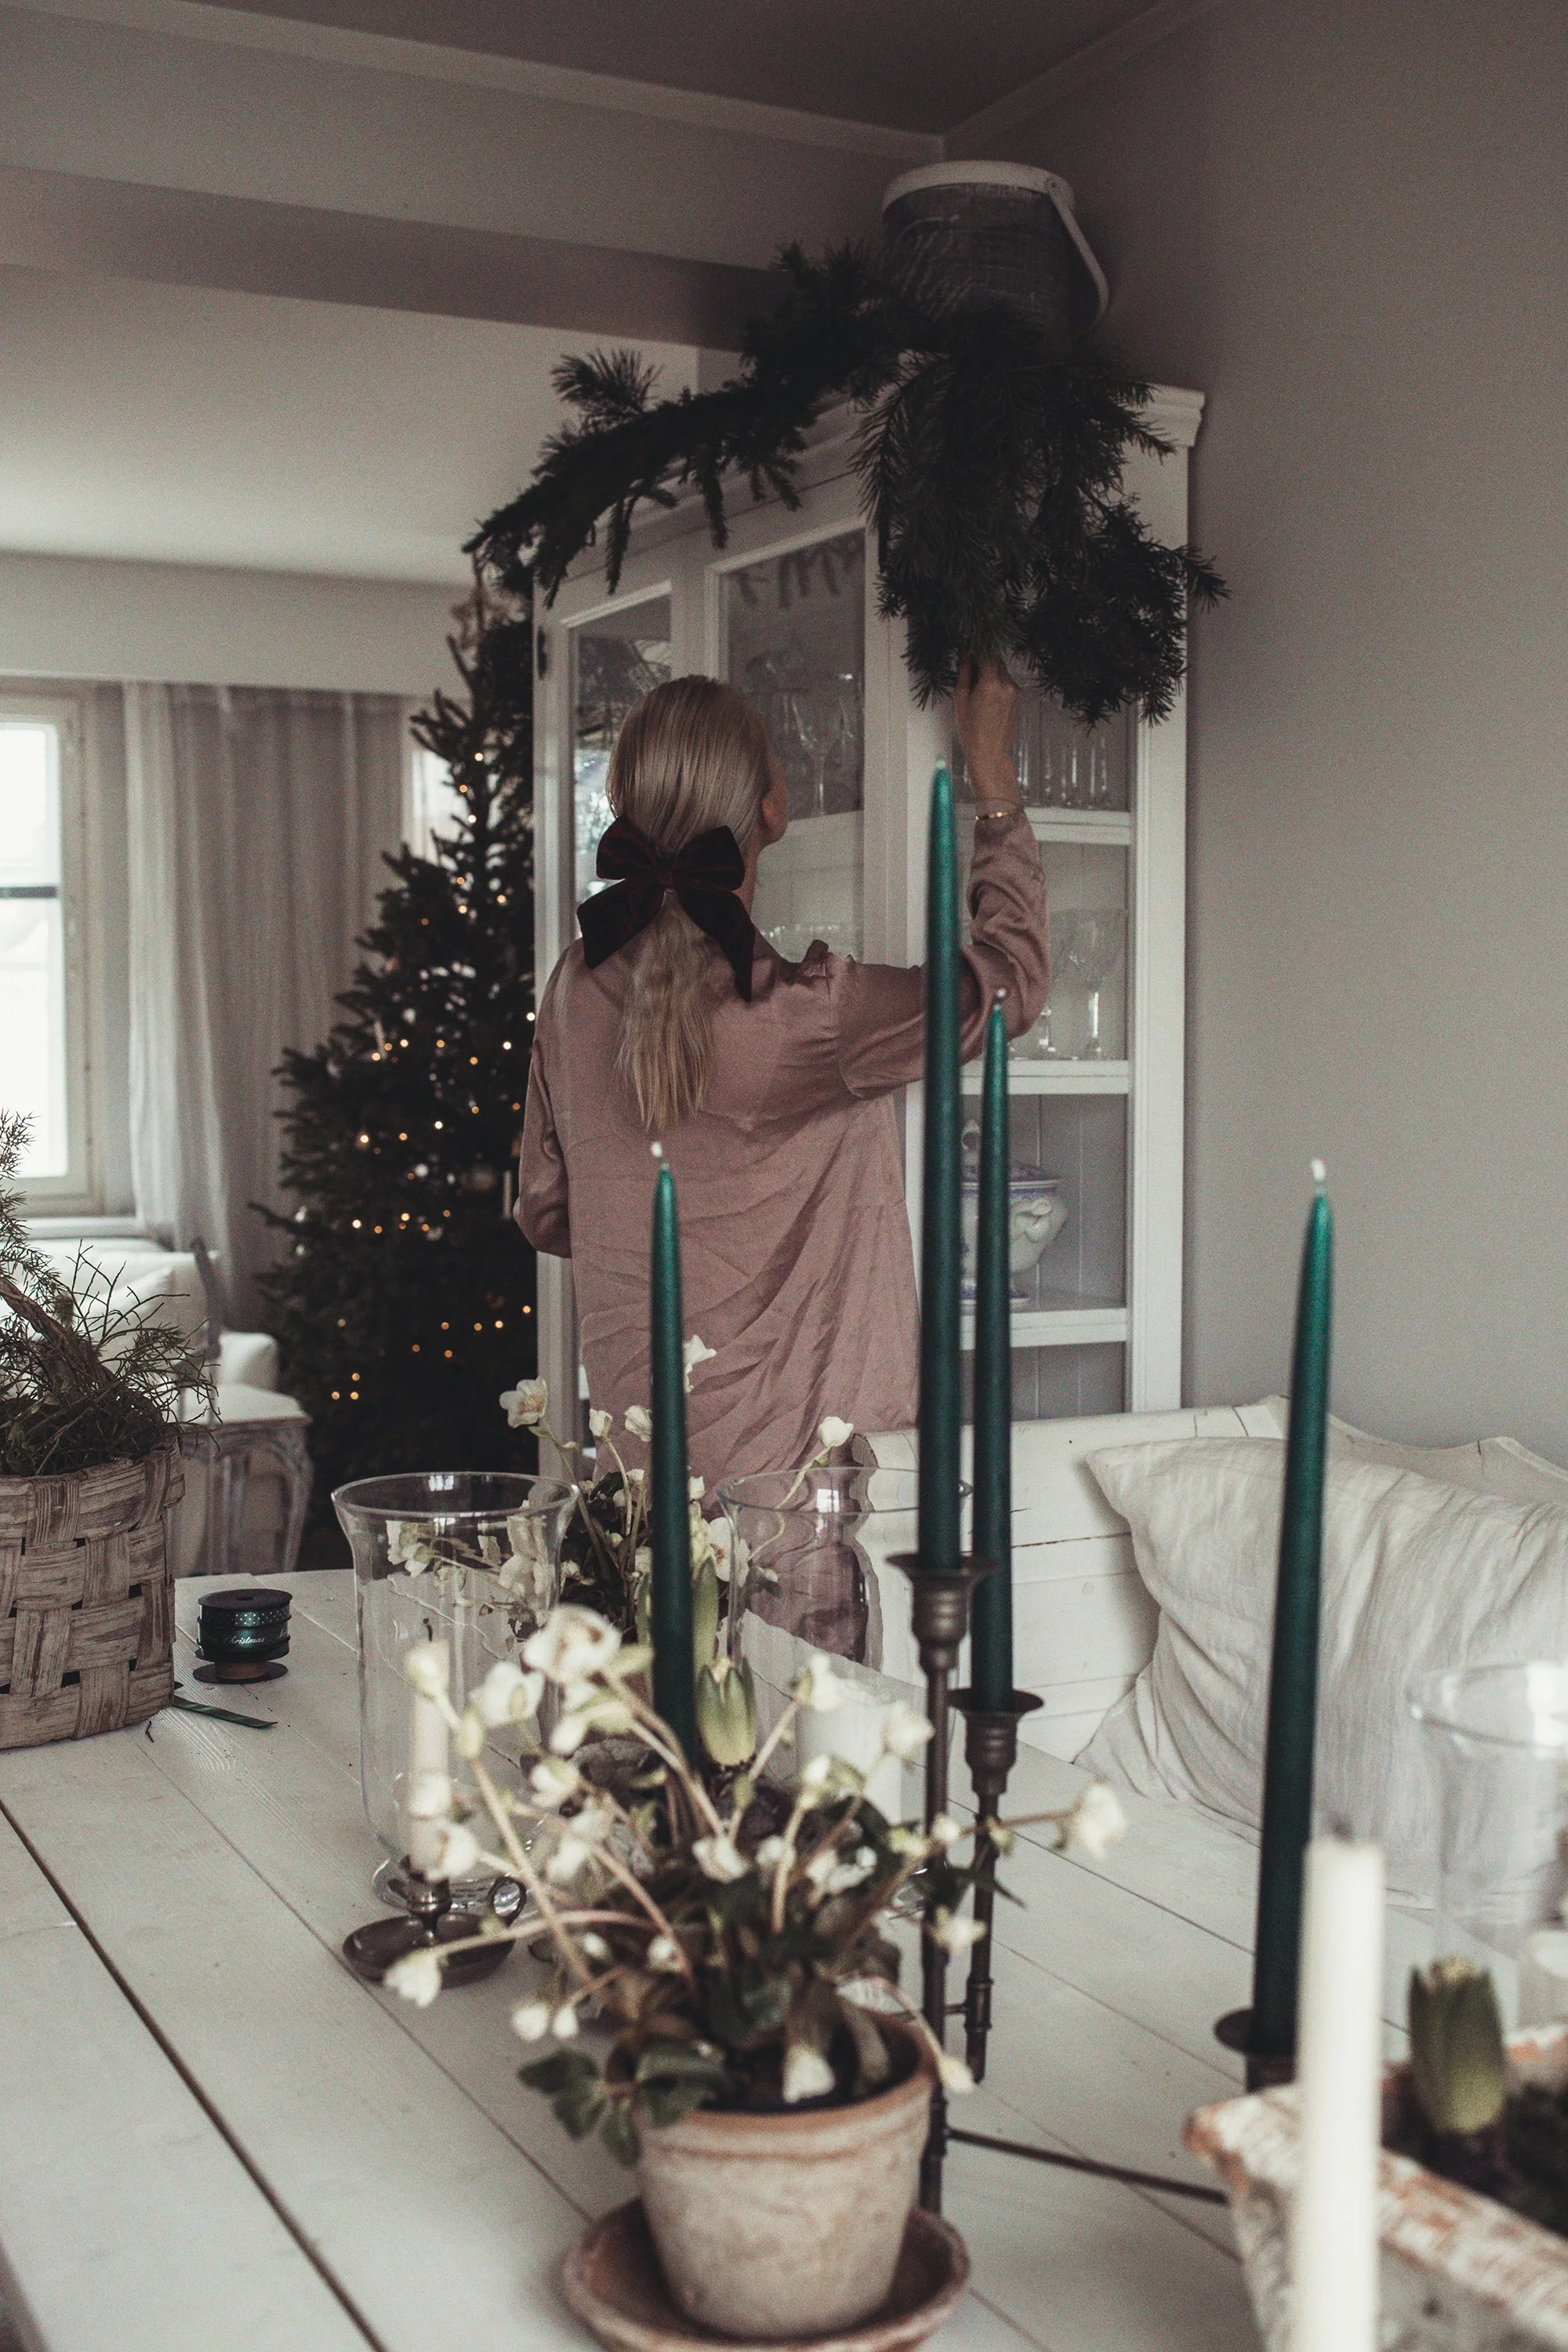
Easy DIY Christmas Garland


DIY Foraged Christmas Garland Tutorial with Chicken Wire Base
Materials Needed:
Chicken wire
Wire cutters
Protective gloves
Foraged branches (evergreen, pine, cedar, holly, eucalyptus, etc.)
Pruners or scissors
Water spray bottle
Step 1: Gather Materials: Collect all the materials you'll need for your foraged Christmas garland.
Step 2: Prepare the Chicken Wire Base: using wire cutters, cut a length of chicken wire according to the desired size of your garland. Form it into a long cylinder, connecting the ends to create a continuous shape. Make sure to wear protective gloves to avoid any scratches from the wire.
Step 3: Shape the Garland Base: manipulate the chicken wire cylinder into the desired shape, whether it's a traditional swag, a circular wreath, or a straight garland. The chicken wire will hold the branches securely in place. I slightly crunched the wire together to make the wire holes smaller.
Step 4: Trim any excess chicken wire and place the cylinder wire on top of your shelf. I also placed some parchment paper underneath the wire to protect from any scratches.
Step 5: Prepare Foraged Branches: trim the foraged branches to manageable lengths using pruners or scissors. Create bundles of branches with varied textures and colors for a visually appealing garland or simply use wild untrimmed branches as I did.
Step 6: Insert Branches into Chicken Wire: starting at the center of the wire base, poke the trimmed ends of the foraged branches into the holes of the chicken wire. Insert them at various angles to create a full and textured look. Continue adding branches along the length of the garland.
Step 7: Overlap and Mix Textures: overlap the branches to conceal the chicken wire and create a seamless appearance. Mix different types of branches to add variety and interest to your garland. Ensure that the branches are inserted securely to prevent them from falling out.
Step 8: Add Decorative Touches If desired: Add ribbons, dried clementine, baubles or any decorative items you prefer. I tried adding baby’s breath and long thin green ribbons but came to the conclusion that I liked the look more without any excess decorations.
Step 9: Spray with Water: lightly mist your foraged garland with water using a spray bottle. This helps to keep the branches hydrated and fresh, extending the lifespan of your creation. Ensure not to soak it; a gentle misting is sufficient.


I added some eucalyptus to the garland from a left over bouquet of flowers

2x Christmas Wreaths


Forage some greens - mainly spruce, pine and blueberry/lingonberry branches
Wreath base
You need bendable young branches or thick florist wire to create the base. If you can forage young branches that bend easily, collect a bunch and bend them into a circle. Secure the circle with florist wire that is twisted around the branches so it stays in place.
If you do not have branches- you can simple twist thick florist wire into a circle and repeat this process a few times so it create strength into the base.
Creating a wreath with foraged goods is a wonderful way to bring a touch of nature into your home. Here's a step-by-step tutorial to guide you through the process:
Materials Needed:
Florist wire or a sturdy wire frame
Pruners or scissors
Foraged goods such as evergreen branches, twigs, pinecones, dried flowers, and berries
Ribbon or twine for hanging
Make the Wreath
Step 1: Gather Your Materials Collect a variety of foraged goods from your garden, local park, or nearby woods. Look for items like evergreen branches, twigs, pinecones, dried flowers, and berries. Ensure they are in good condition and free of pests.
Step 2: Prepare the Base: If you're using a wire frame, shape it into a circle or any desired wreath shape. If you don't have a wire frame, you can create a base by bending a sturdy wire into a circular shape. Ensure the base is strong enough to hold the weight of the foraged materials. You can also make the base from bendable twigs.
Step 3: Create Small Bouquets Take small bunches of foraged goods, making sure they are of similar length. Arrange them in a way that looks pleasing to you. Hold the bundle together and trim the ends to a uniform length.
Step 4: Secure with Florist Wire Use florist wire to tightly bind the trimmed ends of the bouquet. Wrap the wire around the stems a few times and twist the ends together to secure the bundle.
Step 5: Attach to the Base Place the secured bouquet on the wire frame and use additional florist wire to attach it securely. Wrap the wire around the stems and the base, ensuring it's tight and stable.
Step 6: Repeat the Process Continue creating small bouquets and attaching them to the base. Overlap each bouquet with the previous one to ensure full coverage and a lush appearance. Vary the types of foraged goods to add texture and interest to your wreath.
Step 7: Fill Gaps As you work, fill in any gaps or sparse areas by adding smaller pieces of greenery or other foraged items. This will give your wreath a more polished and cohesive look.
Step 8: Add a Hanging Mechanism Once the wreath is complete, attach a ribbon or twine to the top for hanging. Ensure it's securely fastened, especially if your wreath is on the heavier side.
Step 9: Trim Excess Trim any excess stems or wire to give your wreath a neat and finished appearance or let it be wild and free, imperfectly perfect.
Step 10: Hang and Enjoy Find a suitable place to hang your foraged wreath, whether it's on your front door, above the fireplace, or as a beautiful centerpiece. Admire your creation and enjoy the natural beauty it brings to your space.


Cured (gravlax) Rainbow trout


Cured salmon, a delicacy celebrated for its sublime taste and rich cultural significance, holds a special place in the culinary traditions of Finland and other Nordic countries. Also known as gravlax or gravad lax, is a testament to the region's deep connection with the sea and its commitment to preserving and enhancing the natural flavors of high-quality fish. This dish is a staple dish in most households and eaten all year around, also making an appearance in festive occasions, family gatherings, where its presence signifies a joyous appreciation for life's simple pleasures.
Curing, a preservation technique dating back centuries, has evolved into an art form, giving rise to the beloved cured salmon that graces Finnish tables. The traditional process involves coating fresh salmon fillets with a blend of salt, sugar, and often dill, allowing the fish to slowly cure and develop a unique and nuanced flavor profile. Beyond Finland, cured salmon is a culinary tradition shared among Nordic countries, including Sweden, Norway, Denmark, and Iceland. Each region puts its own spin on the curing process, incorporating local herbs, spices, and techniques to create variations that reflect the unique flavors of their landscapes. For this recipe, I added a coating of grated beetroot so the outer coating of the fish turns a lovely magenta color. This stage is optional however and can be left out if you wish to make the traditional version.
In these countries, cured salmon is not merely a dish but a cultural ambassador, transcending borders and bringing people together through shared culinary experiences. Whether served as a centerpiece in open-faced sandwiches known as smørrebrød in Denmark, or alongside crispbread and sour cream in Sweden, cured salmon embodies the essence of Nordic cuisine and the enduring connection between the people and the sea.


Cured Salmon Recipe:
Choose fresh, wild-caught salmon (I used rainbow trout) with a firm and shiny surface. Ensure it stays cool during shopping.
Remove bones and fins, leaving the skin. Spread coarse salt (approx. 2 tbsp/kg) and sugar (approx. 1.5 tsp) on the fish. Add dill, grated beetroot & a bit of grated lemon zest spread evenly on top. I used no measurements for the dill/beetroot but maybe less than 1/2 cup depending on the fish size. It is important the the surface of the fish is covered.
Wrap the fillet tightly in clingfilm and place into a dish that can be refrigerated. If using two fillets, position them facing each other with the skin side outward.
Apply a light weight on top of the fillet. Allow it to cure in the refrigerator for 1-2 days.
Wipe the cured salmon's surface. Slice it thinly with a sharp knife, removing the skin.
Garnish the salmon plate with fresh dill, lots of black pepper and lemon for serving.
Cured salmon is also a great addition to add on canapes if you are having a dinner party. Add a little sour cream (perhaps mixed with chopped capers/red onion and dill) dolloped on top of a canape with a thin slice of cured salmon on top.


Puff Pastry (joulutorttu taikina levy) base
In Finland during the Christmas time we have a ready made frozen puff pastry base (joulu torttu taikina) that is often used to make different sweet or savory treats. It is essentially a puff pastry base- to make this shape see the images below:
Cut the puff pastry into squares: Cut a smaller square inside (an “L” shape) leaving 2 sides un-cut, opposite of each other as seen in the image below. Then fold one side to the other and repeat with the other side. Fork holes into the middle of the diamond so this part does not raise in the oven. Bake in the oven for 5-10 minutes in 200 C.


French-Style Potting with Inspired Flowers


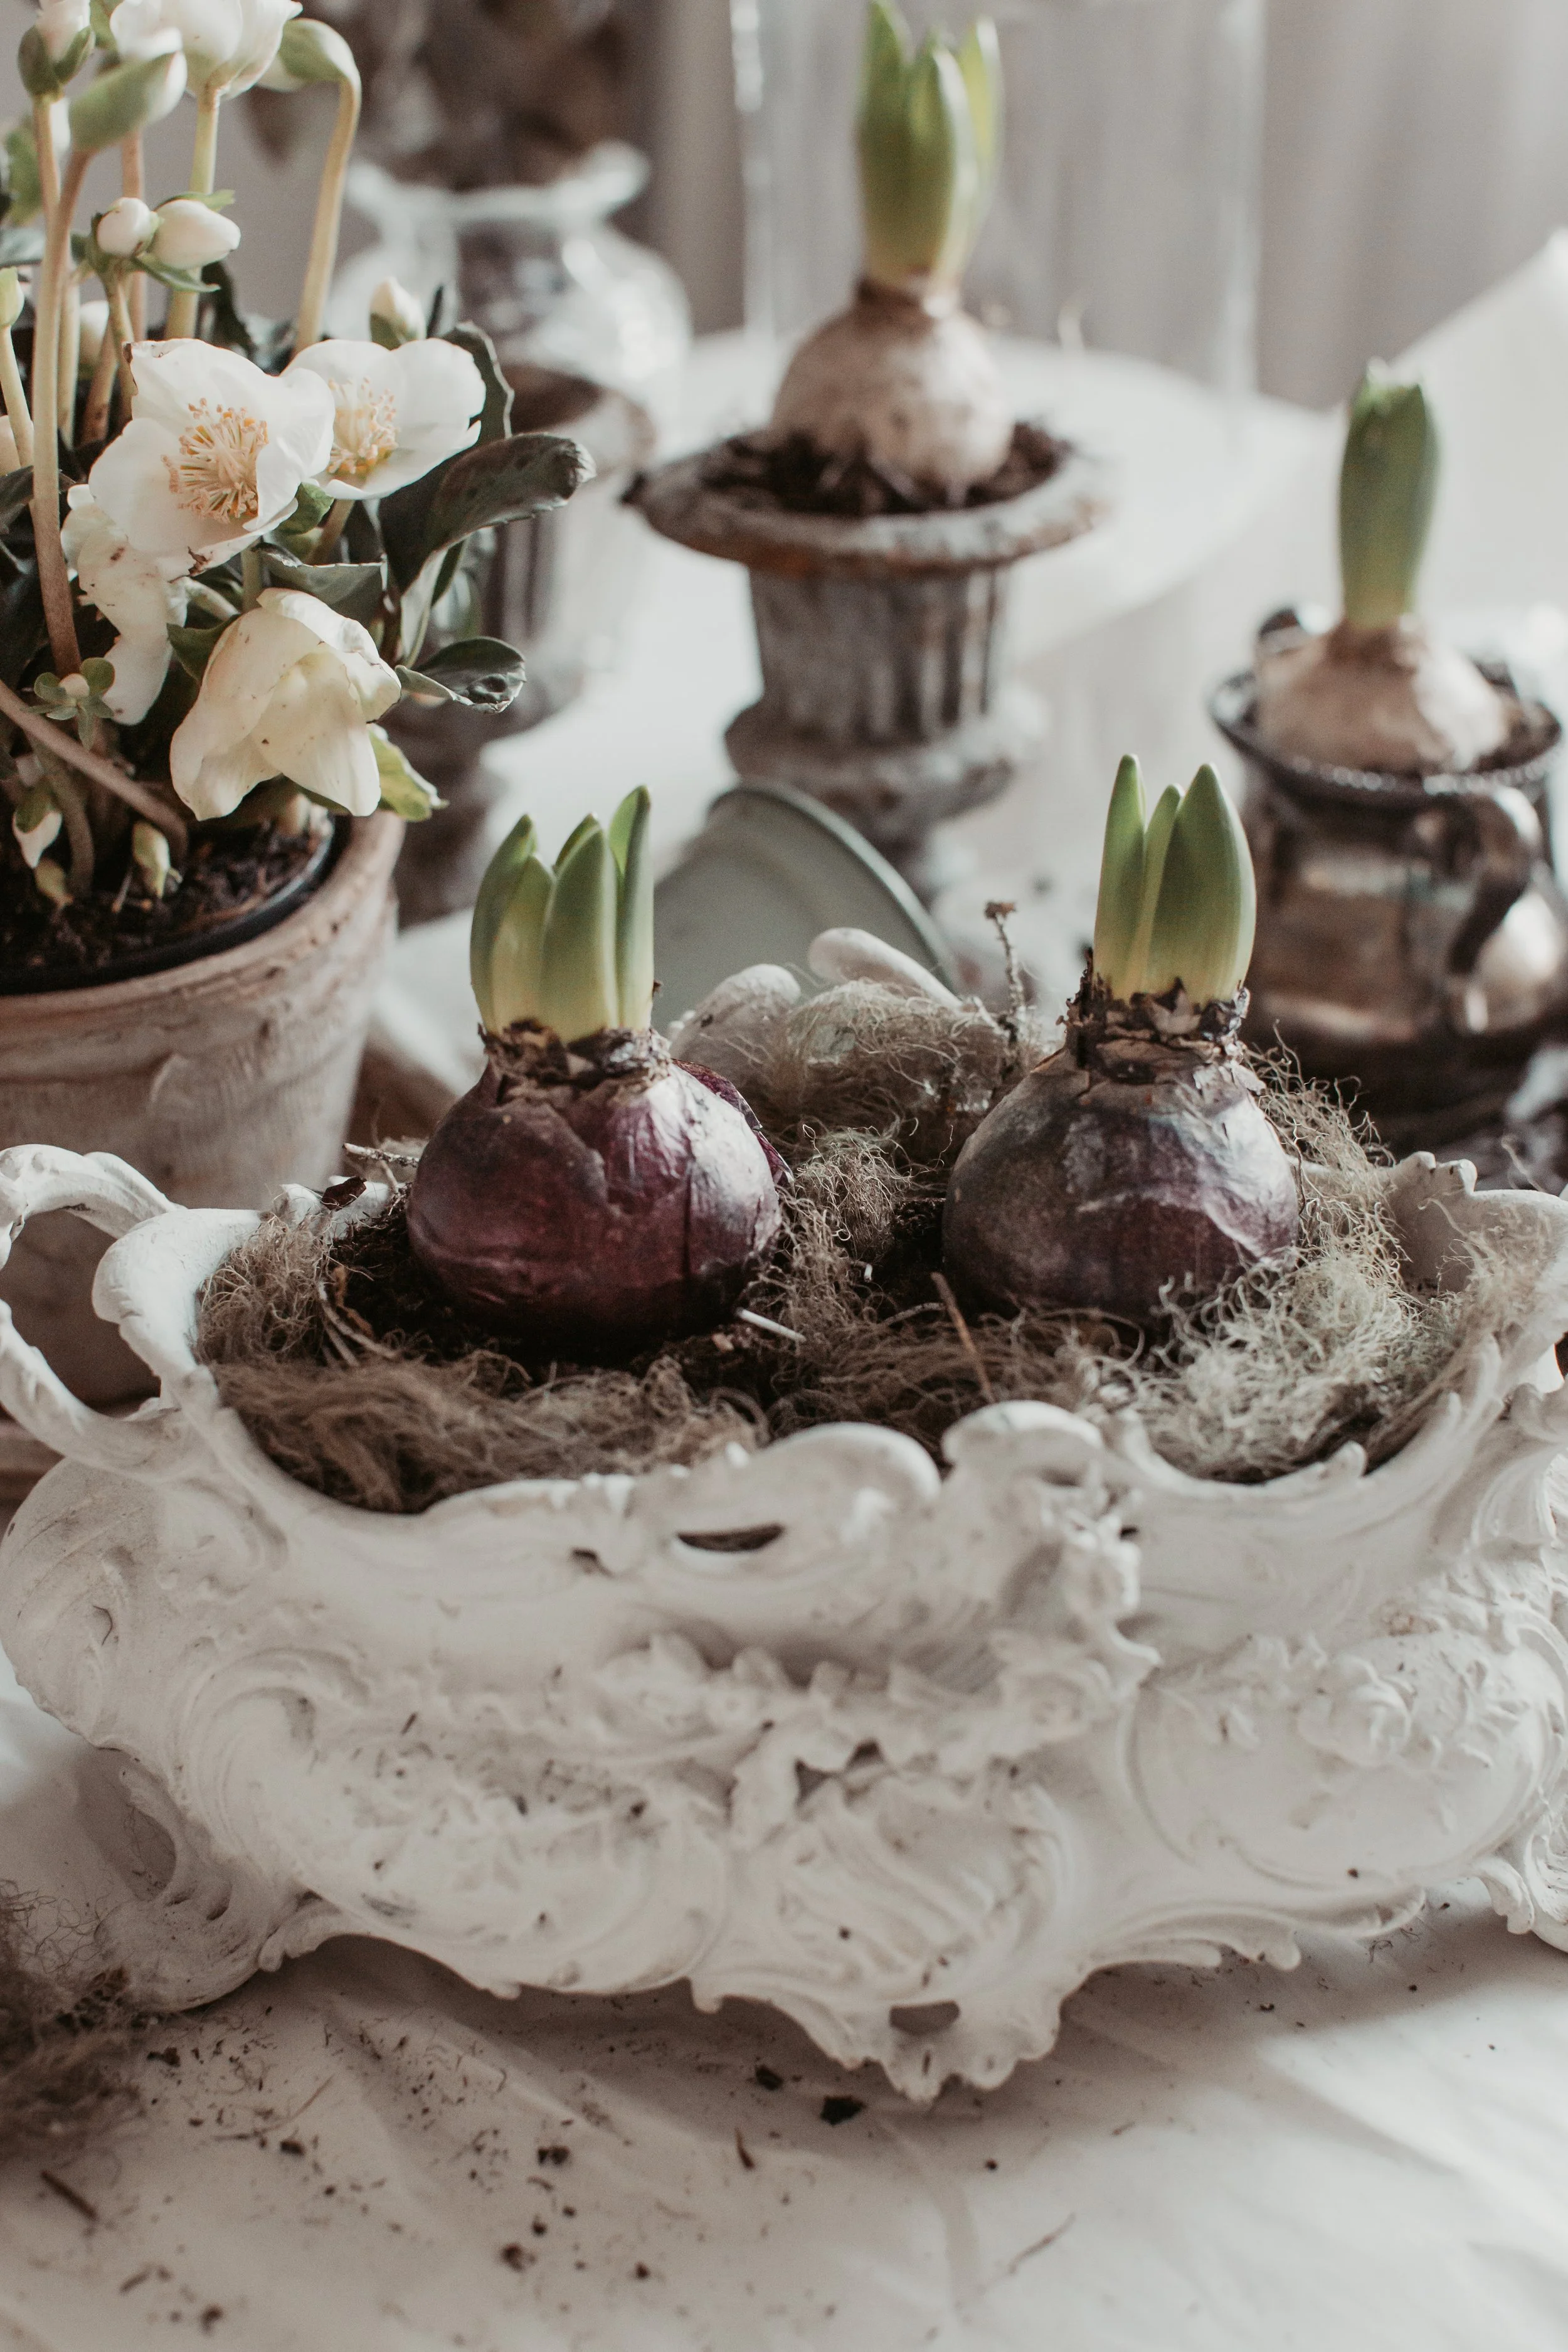
Elevate Your Christmas Decor: French-Style Potting with Inspired Flowers
As the festive season approaches, it's time to infuse your home with the spirit of Christmas, and what better way to do so than with a touch of French elegance and timeless flowers? Picture this: Hellebores, Hyacinths, and delicate ornaments, potted in exquisite French-style cast iron and terracotta pots, creating a scene that effortlessly combines sophistication with simplicity. To add an extra touch of magic, imagine the gentle drape of beard lichen delicately adorning these floral arrangements, transforming your home into a winter wonderland.
Hellebores: The Winter Jewels
Known as the Christmas Rose, Hellebores are the stars of the winter garden. These enchanting flowers, available in various shades ranging from creamy whites to deep purples, are resilient and add a touch of elegance to any setting. Potting them in French-style containers enhances their charm, providing a classic and refined look. Consider placing these pots strategically around your home, perhaps on a mantle or as a centerpiece for your Christmas table.
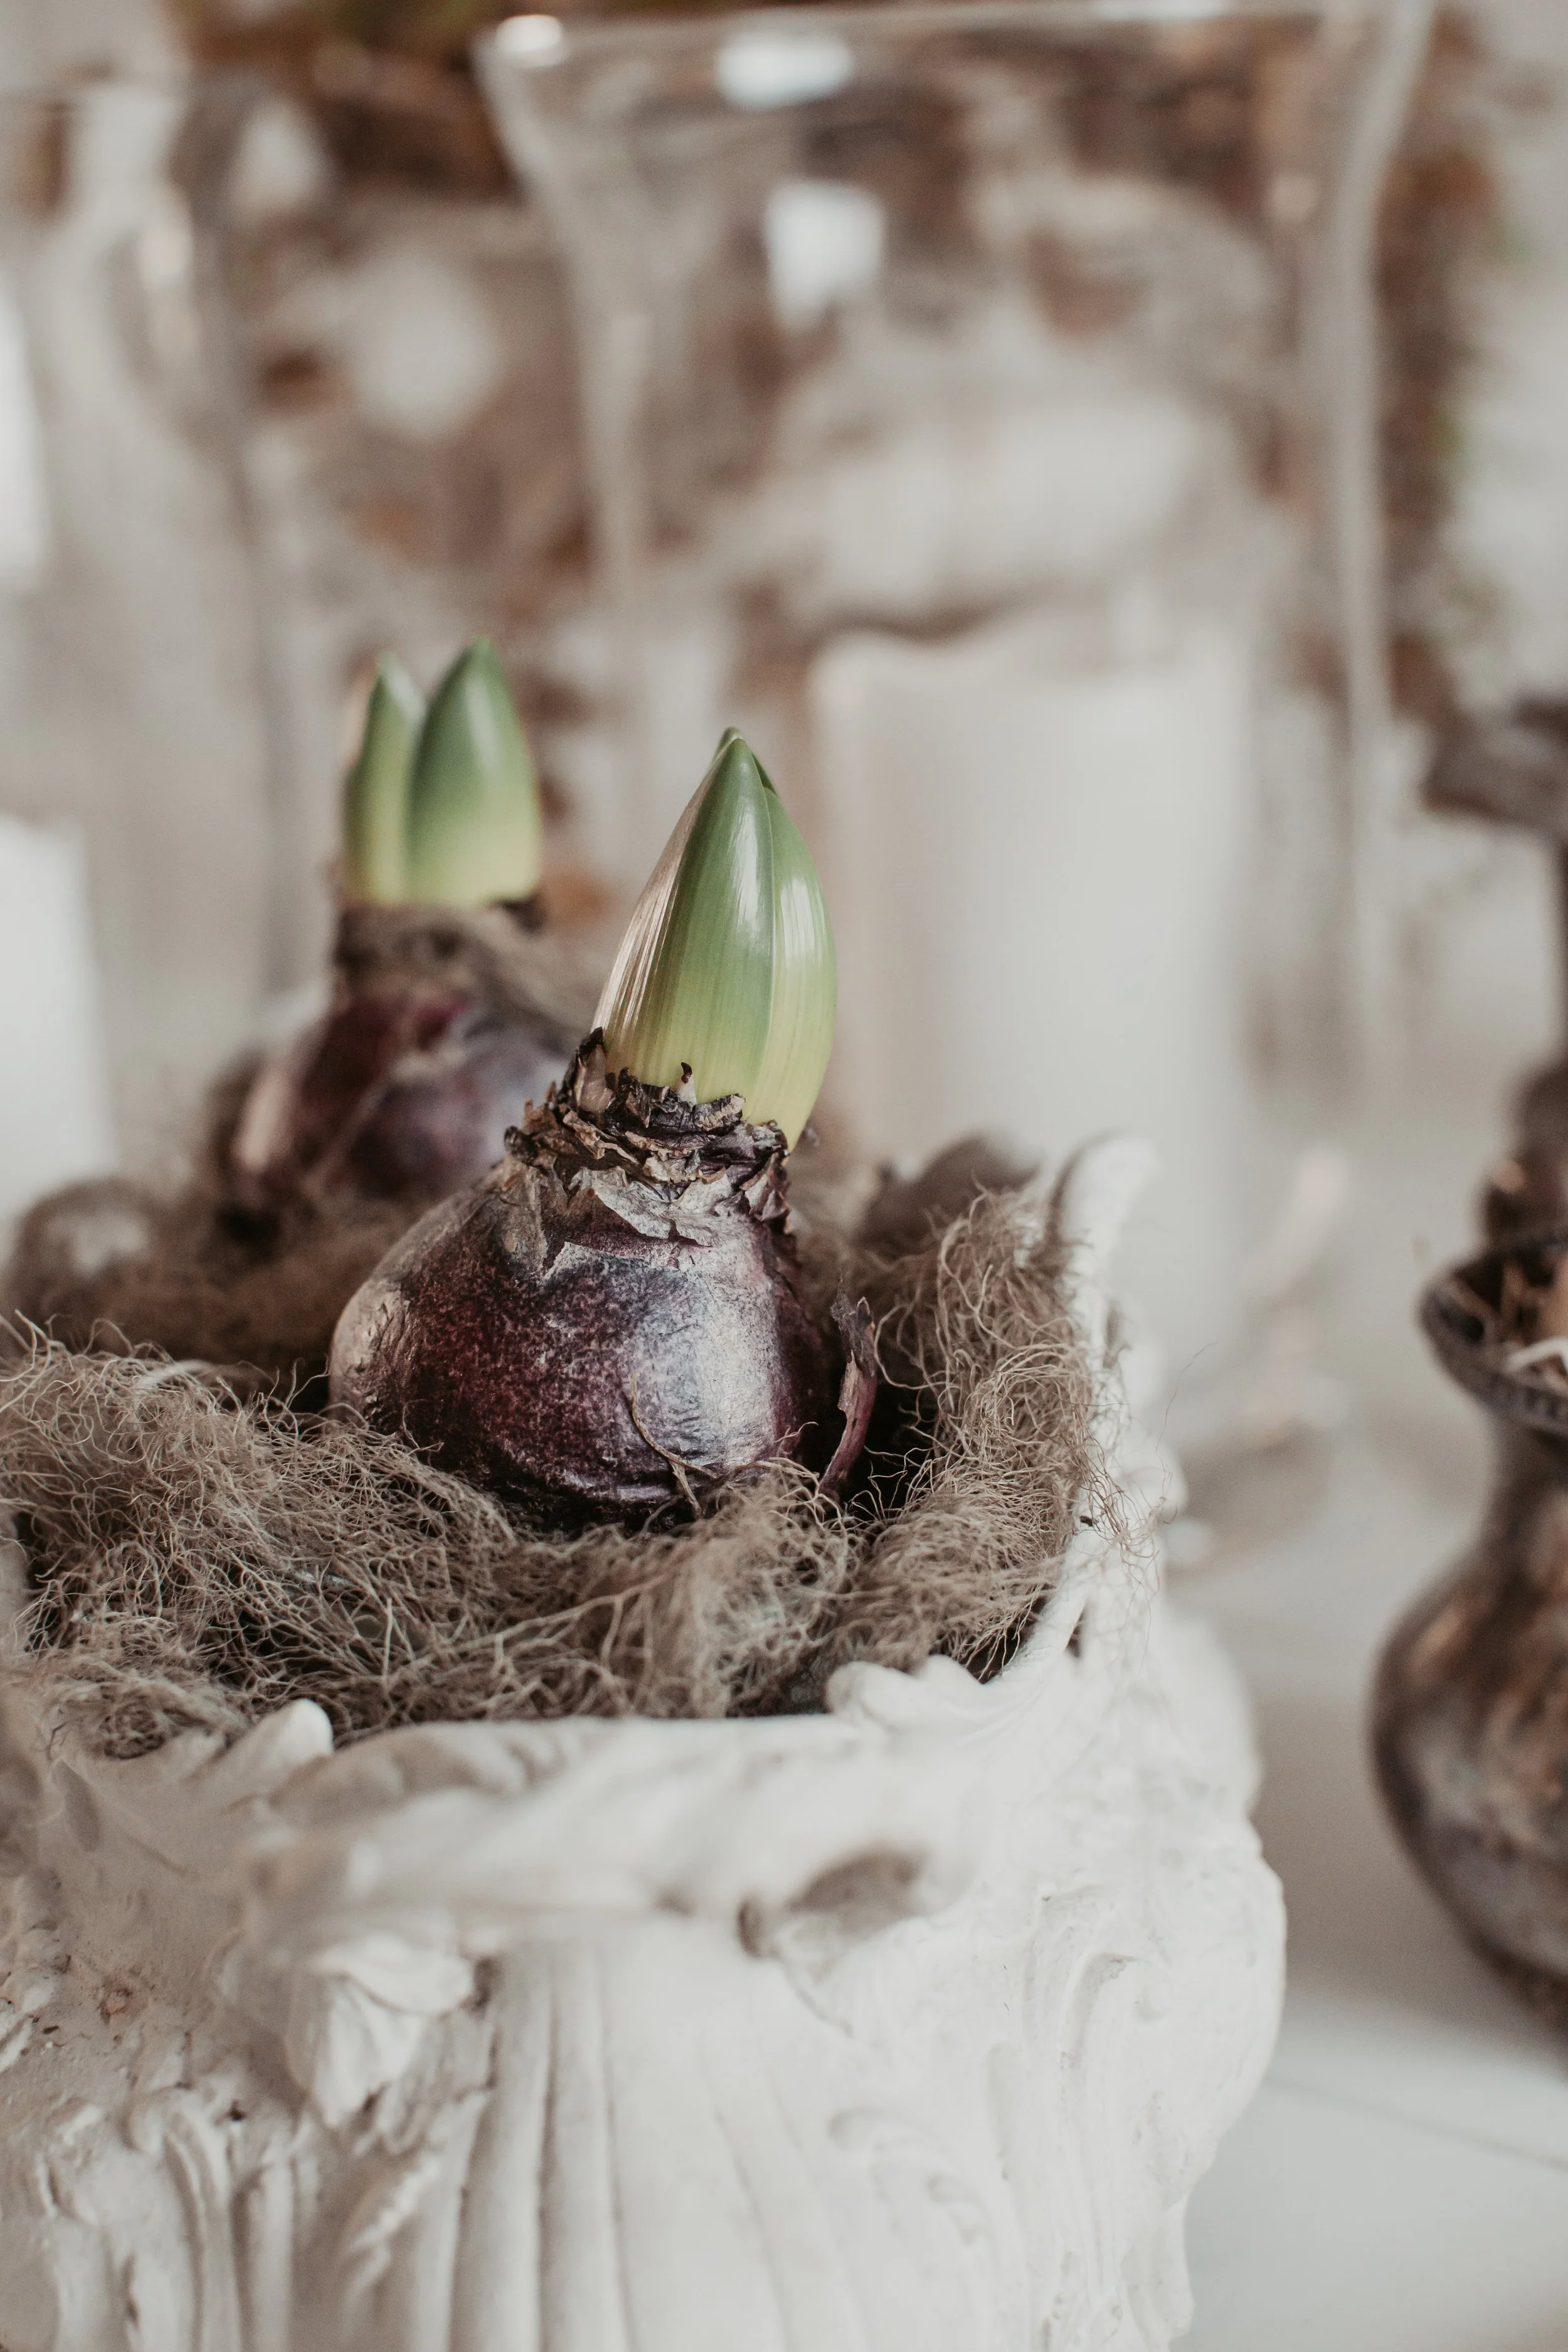
Hyacinths: A Fragrant Symphony
Hyacinths bring not only vibrant colors but also a delightful fragrance to your holiday decor. These bulbs, when potted in French-style containers, create a visual symphony that harmonizes with the festive spirit. Opt for a mix of colors – from the traditional Christmas reds to soothing whites – and let their intoxicating scent permeate your home. Placing them in cast iron or terracotta pots adds an extra layer of sophistication, making them a visual and olfactory delight.
French-Style Pots: A Timeless Touch
French-style cast iron and terracotta pots are synonymous with understated luxury. Their ornate detailing and classic shapes complement the simplicity of Christmas flowers, creating a look that is both opulent and unpretentious. Consider varying sizes and shapes to add visual interest to your arrangements. These pots not only serve as vessels for your Christmas blooms but also become statement pieces that elevate your holiday decor. Terracotta and aged pots, with their timeless appeal, effortlessly weave a narrative of history and tradition into any space. Crafted from natural clay, terracotta pots exude warmth and authenticity, their earthy tones creating a rustic yet elegant ambiance. Aged pots, weathered by time, carry the marks of seasons past, telling a story of enduring beauty. Whether adorning a garden or gracing an interior setting, these vessels add character and a sense of heritage, their weathered surfaces inviting a connection to the past while infusing a touch of enduring charm into the present. Each crack and patina tells a tale, making them not just containers but vessels of time itself.
Beard Lichen: Nature’s Garnish
To add a whimsical touch to your floral arrangements, consider incorporating beard lichen. This delicate, hanging moss adds texture and an ethereal quality to your displays. Gently draping it around the potted flowers evokes a sense of winter magic, creating a scene reminiscent of a French countryside Christmas. Additionally, you could use green moss around pots that also leaves a beautiful finish. I used lichen as it grows in our spruce trees in our property.
Table Setting Extravaganza
Extend the charm of your Christmas floral arrangements to your table setting. Place potted Hellebores and Hyacinths in the center of the table in a curated arrangement of French-style pots. Intertwine beard lichen between the pots, creating a cohesive and enchanting tableau that will be the talk of your festive gatherings.
In conclusion, this Christmas season, embrace the art of French-inspired floral arrangements. Potting Hellebores and Hyacinths in French-style cast iron and terracotta pots, adorned with beard lichen, brings an unparalleled level of elegance to your holiday decor. Transform your home into a haven of festive beauty, where every corner tells a story of refined simplicity and timeless charm.


DIY Candle holder
Make your own candle holer by adding soil to a small planting pot. Then add a candle stick to it. Add mroe soil on top and then a last layer of moss or beard lichen. The lichen secures the candle in tightly and makes a beautiful handle holder for a dinner table.

old brass cooler with a hellbeboris

Gift Wrapping Inspo
As the countdown to Christmas Eve dwindles down to just ten days, the fleeting nature of this time becomes all too apparent. This year's Christmas season has unfolded against the backdrop of a distinctive landscape, markedly different from the usual array of little gatherings and festive cocktails in town, a departure enforced by the prevailing pandemic. Undeterred, we're determined to infuse the season with the warmth of the holidays, despite the unconventional circumstances.


As the countdown to Christmas Eve dwindles down to just ten days, the fleeting nature of this time becomes all too apparent. This year's Christmas season has unfolded against the backdrop of a distinctive landscape, markedly different from the usual array of little gatherings and festive cocktails in town, a departure enforced by the prevailing pandemic. Undeterred, we're determined to infuse the season with the warmth of the holidays, despite the unconventional circumstances.
Venturing into town for the remaining gifts is still on the to-do list, although some thoughtful purchases have already been secured. Amidst the hustle, I find solace in the art of gift wrapping, an activity that elevates the spirit of giving. Personally, I gravitate towards wrapping paper with natural, muted tones, eschewing the ostentatious brightness for a more refined aesthetic. Plain "brown" paper, not only easily recyclable but also exuding sophistication through its simplicity, is my go-to choice. Adorned with delicate strings or the verdant charm of evergreen branches, it attains a subtle yet captivating beauty.
Lace or jute, in an array of muted colors, complements the wrapping paper seamlessly. For an added touch of elegance, consider snipping a fresh flower bud from around the house just before placing the gift under the tree. For recipients who relish adorning their homes, incorporating a homemade wreath or a glass jar filled with dried herbs alongside the presents adds a personalized touch.
For an eco-conscious twist, opt for fabric cloths as reusable gift wrap, destined to be passed down through generations of celebrations. A nugget of information worth noting – glitter-adorned paper may look enchanting, but it isn't recyclable, making it a less eco-friendly choice.
If you find yourself in need of gift ideas, consider the timeless allure of artisan perfumes, the luxury of cashmere, or the indulgence of silk pajamas. Special candles, French soaps, coffee table books, linen, and antiques make for delightful presents, resonating with a touch of sophistication. For the gentlemen, cozy joggers, driving gloves, thick knits, or quality leather goods may be just the ticket.
When visiting friends, a thoughtful gesture can be a nice bottle of wine, accompanied by specialty coffee beans and perhaps a homemade wreath. And in the spirit of the season, never underestimate the allure of edible goods as gifts.
As the evening settles in, I look forward to creating a cozy atmosphere with a steaming mug of glögi and settling down for a heartwarming Christmas movie alongside my beloved husband.


Oven Christmas Porridge
t is tradition in Finland to eat rice porridge in the morning of the 24th, Christmas eve. The one who finds the hidden almond in the porridge is blessed with luck to the upcoming year. Traditionally the rice is cooked slowly in whole milk (constantly stirring) and served with a sprinkle of cinnamon and a dollop of butter. This tradition is not a must in our household but I do love a cozy rice porridge during the dark mornings leading up to Christmas.


‘Oven Christmas Porridge during the days that lead up to Christmas’
It is tradition in Finland to eat rice porridge in the morning of the 24th, Christmas eve. The one who finds the hidden almond in the porridge is blessed with luck to the upcoming year. Traditionally the rice is cooked slowly in whole milk (constantly stirring) and served with a sprinkle of cinnamon and a dollop of butter. This tradition is not a must in our household but I do love a cozy rice porridge during the dark mornings leading up to Christmas. My favorite eve tradition with hubby (before visiting family) is to have a frothy coffee in bed with candle lights listening to Christmas songs and taking a long dog walk in the forest before all the hassle starts. Currently it is so dark outside, you easily forget is it morning or night time! Beautiful flowers can overcome these dark December days, just look at the coloring of this antique looking amaryllis? A few buds are still closed up, but these open ones are just magnificent. I love the muted pink and soft greens, really elegant as a flower itself. A couple of bouquets of amaryllis stems would look sophisticated in a table setting, paired with pine or eucalyptus for a softer look.
This 2.0 rice porridge is exemplified with various festive spices and is cooked slowly in the oven so it is gooey and oh so amazing. It doesn’t need stirring (only a few times in the beginning), and it cooks in 175 Celsius degrees for an hour and a half. Not only does it make the kitchen smell of cinnamon, but it tastes hearty and comforting as it should. Keeping in mind, Christmas may be a hard time for many out there so a little soulful food in the morning, is not such a bad idea.
Oven Porridge
2 dl rice porridge
1L whole fat milk
Pinch of salt
Butter to grease the oven dish
½ cup frozen berries of choice I used a mixture of frozen lingonberry and blueberry that we picked over the summer)
1 teaspoon cinnamon (optional: plus 1 cinnamon stick)
1 teaspoon cardamum
1 teaspoon ground ginger
1 teaspoon ground nutmeg
1 teaspoon of vanilla paste
Toppings
Pecan nuts
Brown sugar
dates
Directions
Begin by greasing the oven dish. Add in all the ingredients and give a little stir. Do not be alarmed by the liquid consistency. Do not put the toppings yet. Place the lid on and put into the oven for 1.5 hours. After 1 hour, add on the toppings; arrange the pecans and dates and sprinkle a bit of brown sugar on top. Place it back into the oven for another 30min before serving. Once ready to eat, serve with fresh berries of choice and a little bit more of cinnamon. I would have served this with fresh figs, but did not have any in the store so blueberries will do.


Gooey Blueberry Cinnamon Buns
Have I got the recipe for you… These oozing blueberry cinnamon buns are moist and gooey, perfect for a little sweet treat during the holidays. I wanted to make buns stacked in an oven dish and not too many of them, so I think this recipe calls for the perfect amount. I basically used a normal cinnamon bun recipe but added a little extra by filling it with a berry glaze alongside the cinnamon sugar mixture.


Have I got the recipe for you… These oozing blueberry cinnamon buns are moist and gooey, perfect for a little sweet treat during the holidays. I wanted to make buns stacked in an oven dish and not too many of them, so I think this recipe calls for the perfect amount. I basically used a normal cinnamon bun recipe but added a little extra by filling it with a berry glaze alongside the cinnamon sugar mixture.
While the buns were cooking in the oven, I was walking our dog and kid-you-not, there was the most wonderful smell lingering in the hallway of our apartment before I stepped back inside. I wanted to share this recipe with you as fast as possible, so you can bake this on Christmas morning if you love to start the day with something sweet. My husband who does not have a major sweet tooth, loved this dish, so will be making it much more gladly than traditional cinnamon rolls. This little festive treat made to be eaten with woolen socks on, under the blanket with the fire roaring in the background. We ate the remaining of the buns last night while watching Home Alone 2, all cozy in our living room.
Bun Ingredients: (serves 1 baked tray)
2.5dl whole milk warm
75g dry yeast (1 packet)
1 egg
1dl sugar
1 tablespoon cardamum
1 teaspoon salt
About 7dl flour
75g melted butter
Bun Filling
50g butter
½ dl brown sugar
2 tablespoons cinnamon
1 cup Blueberry filling (see recipe below)
Blueberry filling
1 1/2 cups frozen berries of any kind (I used blueberries)
1 cup icing sugar
2 teaspoon honey to taste
2 tablespoons corn starch
Dash of vanilla extract
Blueberry Glaze
½ cup powdered sugar
1-2 teaspoons milk
1 tablespoon of blueberry filling
Blueberry filling Directions
In a small saucepan, add the blueberries and bring to a gentle boil. Let them soften a bit and add in the remaining ingredients. After a few minutes of gently simmering, puree into a desired smoothness with a hand-held blender. I left some chunks to add a bit of texture. Bring back to gentle simmer and let the filling thicken. Leave to side to cool.
Blueberry Glaze Directions
Make a traditional frosting by mixing together powdered sugar and a bit of milk. Use a lot more sugar (1/2 cup) than milk (1-2 teaspoons) for a thick glaze. Take a tablespoon of the blueberry filling and mix it into the glaze so it turns it a wonderful purple color.
Directions for Buns (1 ½ hour) 23cm x 12cm bread tin
In a large bowl, add the dry yeast to the warm milk and allow it to dissolve by stirring. Mix in the egg, sugar, cardamum and salt. Slowly, pour in the flour kneading it along the way. Add in the melted butter in the end. The dough is supposed to be soft so that you can just remove it from your fingers and so it does not stick to the bowl. Allow the dough to rest (under a kitchen towel in a warm spot) for 20minutes.
Meanwhile the dough is resting, make the blueberry filling and allow it to cool.
Knead the dough on a flat surface. Spread some flour on the surface so the dough does not stick to it. Roll out the dough into a rectangle so it is thin enough to roll it later. Then spread the softened butter all over along with a dusting of brown sugar. Spread the blueberry filling mainly in the center of the dough so it is easier to roll. Then roll the dough, it does not matter if it does not look perfect. Make sure the seam is on the bottom so it is easier to cut. Cut into enough pieces that fit our baking tray. I used a smaller bread tin that was 6cm in height so I cut roughly the same length rolls. Butter your bread/cake tin and place the rolls “standing up” alongside each other, all along the tin. Place the kitchen towel on top and let them rest for 15 minutes before baking.
Add little knobs of butter on top of each roll and a sprinkling of brown sugar. Bake in the oven at 225 Celsius degrees for 8-10 minutes so they are crispy on top but soft on the inside.
Eat either straight from the oven or let them cool. Pour the blueberry glaze on top before serving.


Velvety Hot Chocolate
Indulge in the epitome of decadence with this sumptuous hot chocolate, specially crafted for those enchanting Christmas movie nights. Unlike your typical hot beverage, this luscious concoction is a once-a-year delight, perfectly timed for the festive cheer that Christmas eve brings.


Indulge in the epitome of decadence with this sumptuous hot chocolate, specially crafted for those enchanting Christmas movie nights. Unlike your typical hot beverage, this luscious concoction is a once-a-year delight, perfectly timed for the festive cheer that Christmas eve brings.
Immerse yourself in the velvety sweetness of this rich and thick chocolate elixir, designed to be savored slowly and luxuriously. Each sip unfolds like a taste of celestial chocolate, thanks to the infusion of heavy cream and premium-quality chocolate.
Here's how to create this exquisite treat: Begin by snapping a piece from your preferred dark chocolate bar and placing it in a saucepan with heating heavy cream. For a single serving, approximately 1/3 of a standard-sized bar (around 9 pieces) and 2 cups of cream should suffice, equating to one cup of cream per person. As the chocolate gracefully melts into the cream, introduce a hint of cinnamon and incorporate a touch of vanilla paste for a delightful flavor profile. Enhance the sweetness with the subtlest pinch of salt, creating a nuanced depth to the overall taste. Adjust sugar to your preference, although with the inherent sweetness of the chocolate, additional sugar may not be necessary.
Now, clad in your coziest pajamas, pour this heavenly hot chocolate into your favorite mug and snuggle in for an evening filled with Christmas classics. If your tree is yet to be adorned, let this exquisite beverage be your companion as you adorn it with festive decorations, creating a truly magical holiday ambiance.


Unwind with a Festive Pear Cocktail
As households wind down, with some preparing for an overnight pig roast and others wrapping gifts, a well-deserved cocktail is in order on this eve before Christmas. Amidst the hustle and bustle of the past two days filled with cooking, baking, errands, gift finalizations, and cleaning, the winding-down process has begun. As the late evening sets in, there are still a few tasks to complete, but a festive honey pear cocktail is the perfect way to kickstart the Christmas celebrations.

As households wind down, with some preparing for an overnight pig roast and others wrapping gifts, a well-deserved cocktail is in order on this eve before Christmas. Amidst the hustle and bustle of the past two days filled with cooking, baking, errands, gift finalizations, and cleaning, the winding-down process has begun. As the late evening sets in, there are still a few tasks to complete, but a festive honey pear cocktail is the perfect way to kickstart the Christmas celebrations.
In the backdrop of a Christmas playlist and the warm glow of candles, I'm testing out tomorrow's outfit – a long glitter dress with an open back or a simple yet elegant champagne-colored silk gown. The air is uncertain globally, with many facing lockdowns and loneliness during the holidays. Let's take a moment to make those distant phone calls and extend a helping hand to those in need. My parents are opting for a quiet Christmas in the countryside, and despite the sadness, it's the responsible thing to do. This year has shown us the reality of uncertainty, and whether celebrating with loved ones or choosing to skip Christmas, let's be grateful for the small things.
Amidst the coziness of our house and the flickering lights of our stunning tree, I'm ready to sip on this honey-roasted pear cocktail I found on Pinterest, despite Siena having a puppy flu and a little coffee mishap with our linen curtains.
Ingredients:
5 pears, sliced in half
3-5 tablespoons honey
1 tbsp balsamic vinegar
Pinch of cinnamon
Pinch of ground nutmeg & ground clove
2 tbsp apple juice or water
1 tsp vanilla paste
Sparkling wine
Garnish: dried clementine slices & rosemary
Brown sugar to coat the glass rims
Directions:
Preheat the oven to 200 degrees Celsius. Line a baking tray with a greased sheet.
Place the halved pears (remove stems) on the tray.
In a small bowl, whisk together 2 tbsp honey, 1 tbsp balsamic vinegar, cinnamon, and ground nutmeg. Brush this over the pears.
Bake for about 25 minutes until browned and soft.
Once cooled, remove the seeds with a spoon. Place into a blender with the vanilla paste and apple juice or water. Blitz into a puree.
Scoop the puree into a mason jar and refrigerate until served.
When ready to serve:
In a pitcher, combine some pear puree, a pinch of ground clove, 3 tablespoons of runny honey, and your choice of alcohol. Mix together.
Coat the cocktail glass rims with brown sugar by adding lemon to the sides and placing the rims into some brown sugar.
Pour the cocktail into the glasses and garnish with a twig of rosemary and a dried clementine slice.
Cheers to a delightful and relaxing pre-Christmas celebration!


Savoury Fig Pie
I decided to make a savory fig pie for breakfast as we had lots of them in the fridge. You begin by making of the butter pie crust, as it sits in the fridge for a good hour so it’s a good excuse to through yourself back into bed for a while longer. This pie crust is a great easy recipe to remember as it works well with so many other pies, sweet or savory. For the sweet version, you just add a teaspoon of sugar into the dough recipe. For the filling, I wanted something easy and classic to accompany the delicious sweet figs. It builds up of feta, cream cheese and cream, no eggs are needed for this filling. The filling is luscious and soft that sets once the pie cools down.


‘Savoury fig pie & Frosty January Days’
Sunday, we had our pajamas on longer than usual that was followed by a little bit of baking. I love lounging around the house in crispy white linen pj’s and frothy cappuccino in the other hand, it definitely falls for one of my weaknesses. I decided to make a savory fig pie for breakfast as we had lots of them in the fridge. You begin by making of the butter pie crust, as it sits in the fridge for a good hour so it’s a good excuse to through yourself back into bed for a while longer. This pie crust is a great easy recipe to remember as it works well with so many other pies, sweet or savory. For the sweet version, you just add a teaspoon of sugar into the dough recipe. For the filling, I wanted something easy and classic to accompany the delicious sweet figs. It builds up of feta, cream cheese and cream, no eggs are needed for this filling. The filling is luscious and soft that sets once the pie cools down.
We had a little bit of sunlight today, as the temperature dropped from zero to -20 degrees Celsius overnight. As a morning walk with Siena, I decided to snap a few images with my camera of the magical process when the sea freezes. It looks just whimsical, when the sun rises and the water is steaming that minute by minute gets coated with ice.
Butter crust
1 cup all purpose flour
Pinch of salt
6 Tbsp cold unsalted butter cut in cubes
About 4 Tbsp cold water
1 Tbsp unsalted butter melted (for brushing)
For a sweet version, add 1 tsp sugar
Butter crust Directions
To make the butter crust, add the flour and salt in the bowl of a food processor. Pulse to combine. Add the cold cubed butter and pulse about 20-30 times, until the butter is incorporated and the mixture is crumbly. Drizzling in the cold water while pulsing again until a dough is formed. If the mixture looks too dry, add a little more water. Turn out onto a floured surface and form it into a flat disk. Wrap in plastic and refrigerate for at least an hour. This process can be done a day in advance as well.
Feta Whip Filling
1 block of feta
½ packet of cream cheese
½ cup heavy cream
Salt/pepper
2-3 tablespoons of all-purpose flour
Topping
Sliced fresh figs
Honey
Serve with chopped pistachio & dried oregano on top
In a food processor, blend together the feta and cream cheese. Then add the cream, salt and pepper. Place into a bowl and mix in a few tablespoons of flour to add a bit of thickness to the filling.
Make the pie:
Take the dough out of the fridge and layout on a flour surface. Roll out the dough to the shape of your pie tin (I used smaller rectangular ones). Butter the pie tin and place the dough on top. Then, scoop some of the feta filling on top and garnish with slices of figs. Lastly, brush some honey over the figs and add a sprinkling of salt. Brush the pie eggs with melted butter.
Place into a preheated oven of 180 Celsius degrees for about 30minutes until the pie was become golden in color. Once the pie comes out, don’t be alarmed if it looks too soggy, it will stiffen up once it cools down. Serve with chopped pistachios and sprinkle some dried oregano on top.


chocolate mousse layer cake
It is officially the first of March, which means that the snow should slowly start melting allowing space for little buds to push through the surface of the ground. This was the first weekend the temperatures got a little warmer and we were able to enjoy a cup of coffee on the balcony in the wonderful warmth of the sunlight. I also scrapped the balcony floor and cleaned all the dirt that piles up over winter time.


It is officially the first of March, which means that the snow should slowly start melting allowing space for little buds to push through the surface of the ground. This was the first weekend the temperatures got a little warmer and we were able to enjoy a cup of coffee on the balcony in the wonderful warmth of the sunlight. I also scrapped the balcony floor and cleaned all the dirt that piles up over winter time.
This morning I heard the first screeching sound of the seagulls that to me, symbolizes the beginning of Spring. The park is still filled with ice and snow, but I love that the streets are getting a bit drier day by day. Hopefully soon, it’s time to get rid of all winter jackets that is exchanged for a lighter wardrobe.
My husband and I will be going to our summer house in the next couple of days to enjoy a little change of scenery. Finland is going into a partial lockdown mode so it’s nice to escape into the countryside away from the city.
However, since the month has changed, I wanted to make a little layer cake to hopefully kick off the start of Spring. The filling is a light chocolate mousse with blueberries tucked in the middle and the base is a basic sponge type cake, that I always use when making layer cakes.
For the chocolate mousse filling, all I did was add heavy cream with sugar and whipped it and then added some coco powder and whipped it more. I like the cream to be quite solid so it is a bit easier to control when spreading it on the cake. For this cake, I made 2 base layers, but you could three just as easily. After one layer, add some coco mousse in the middle and fill with berries, add another base on top. Then cover the outer surfaces with the mousse and garnish with blueberries and a dusting of powder sugar.
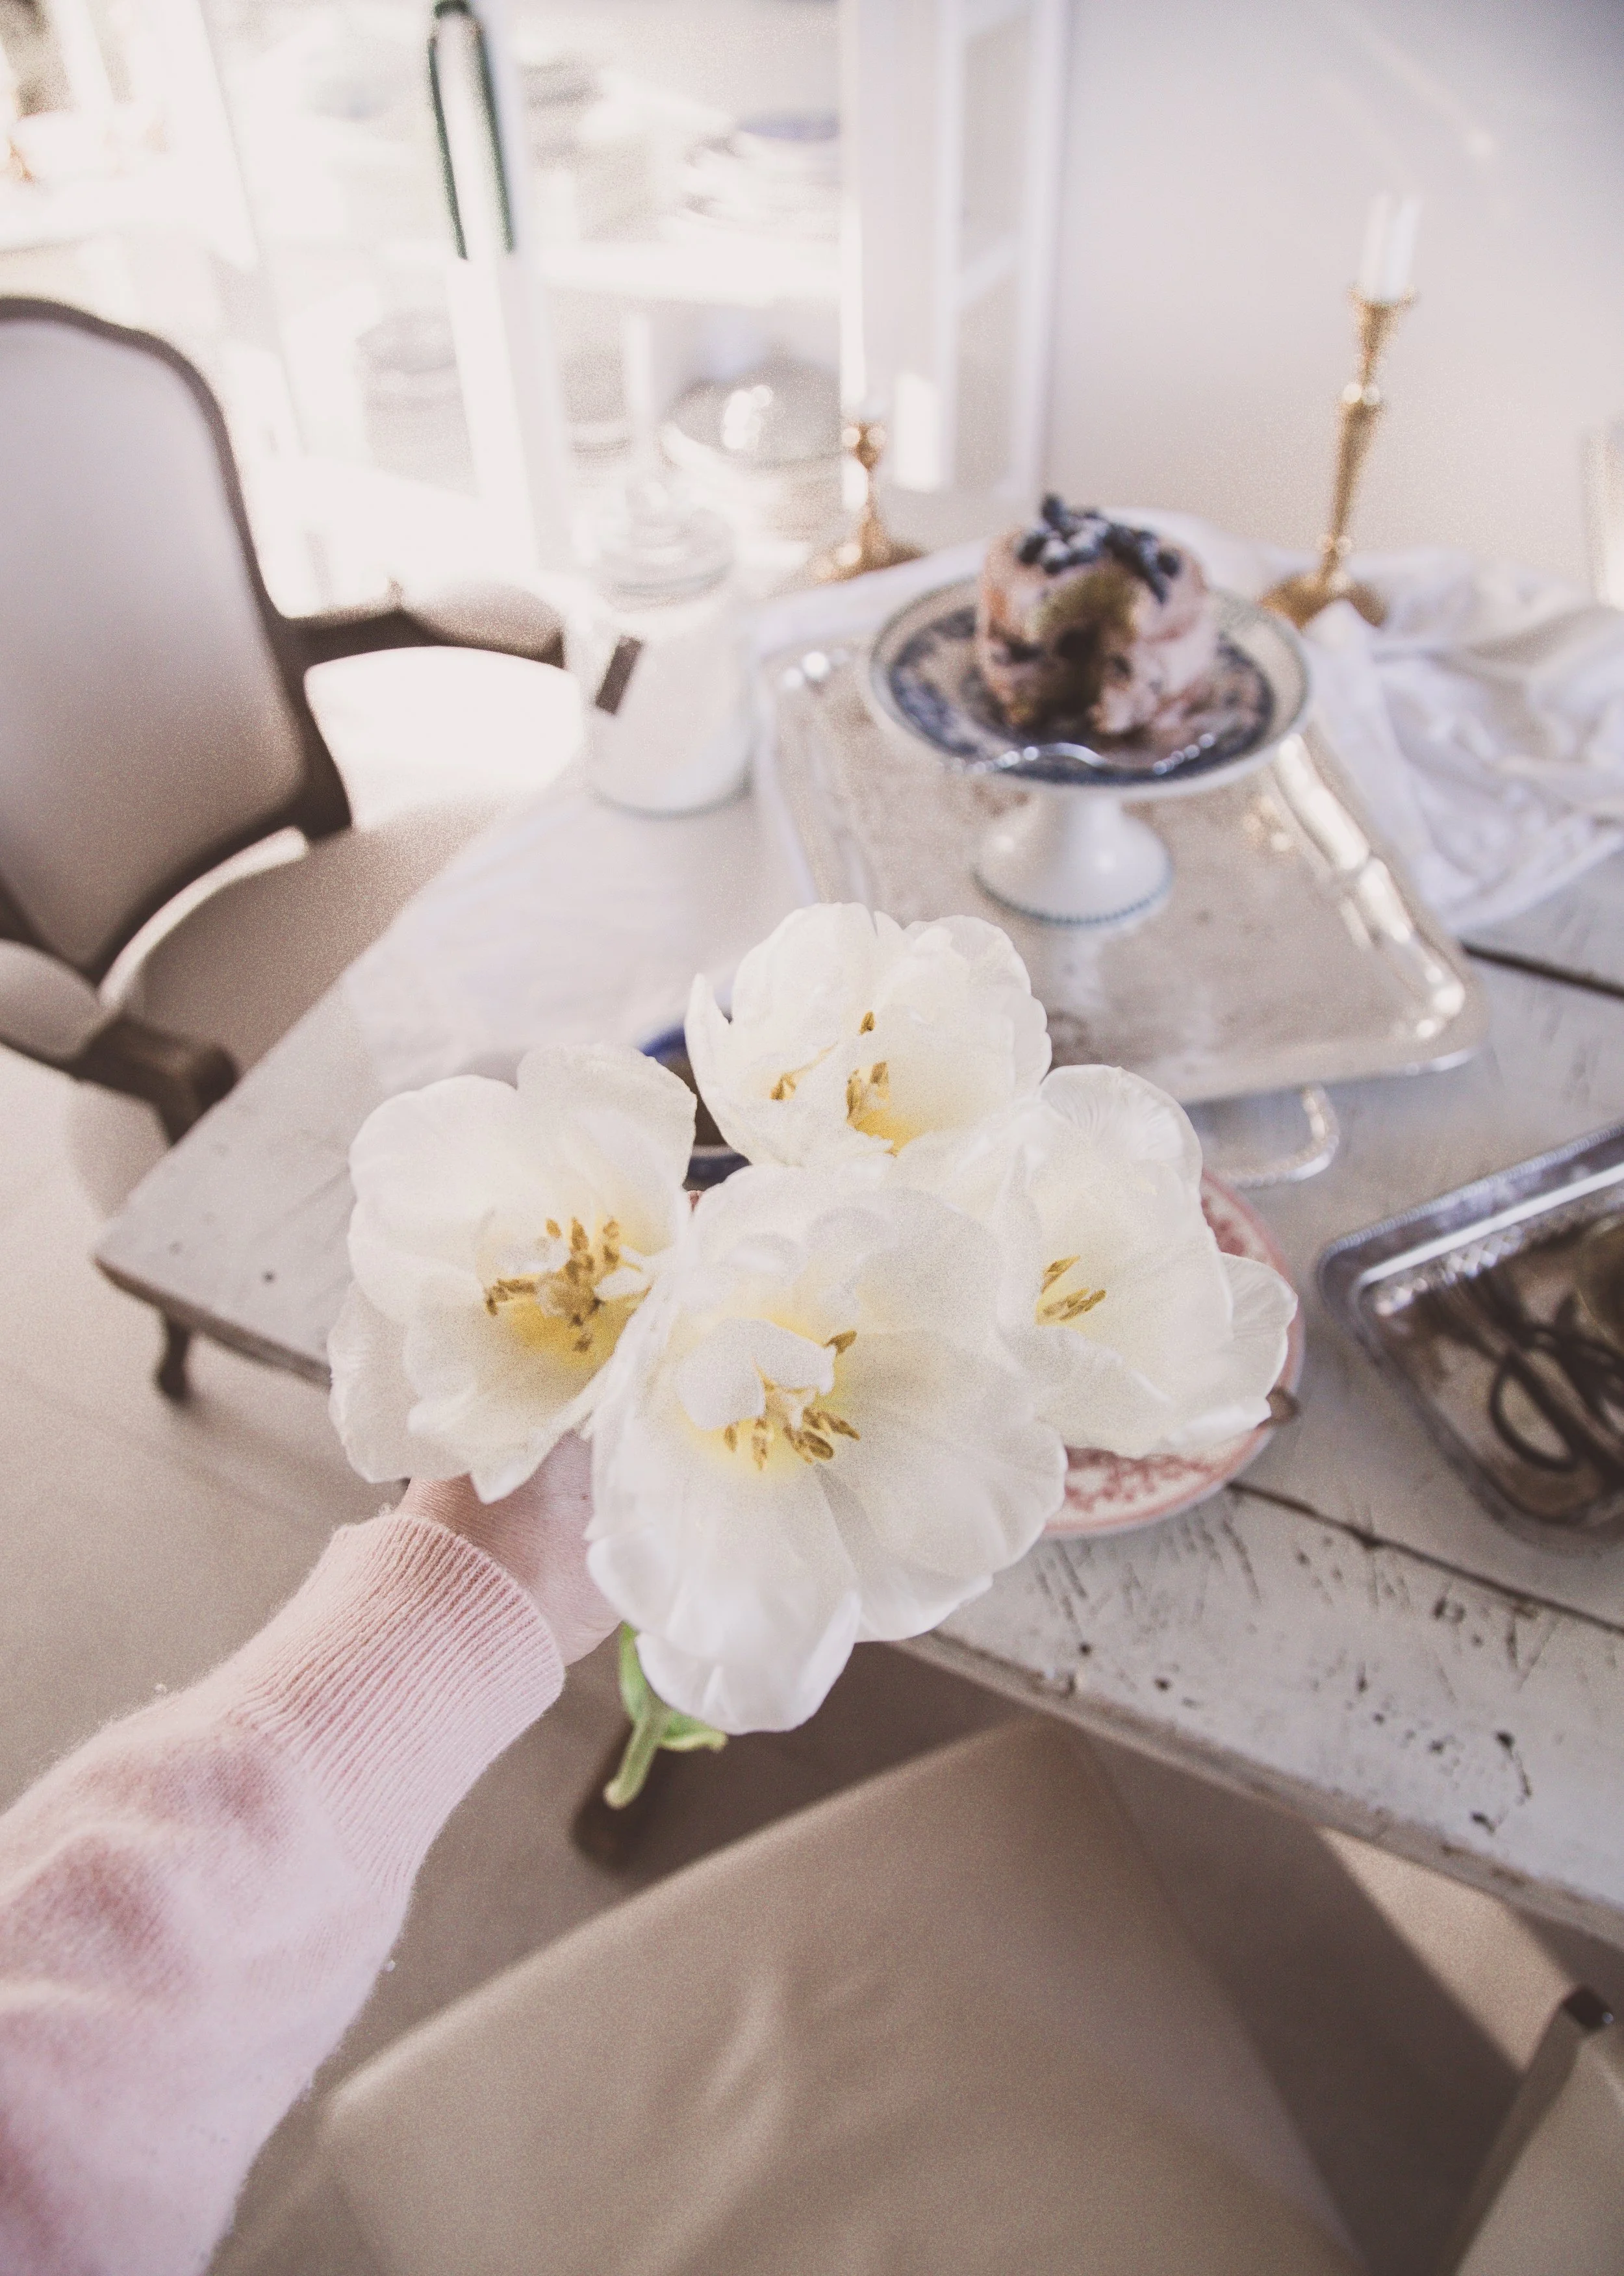
Have you heard of ‘tulip massaging’? I read it from somewhere, that once the tulip begins to wilt, you gently peel back each petal to open the flower up. This gives the tulip a new look (almost like a poppy flower) and gives the flower a longer life. I tested it with a few buds (see in the image below, where I am holding the buds), and thought it looked quite nice. Nevertheless, tulips are a definite sign of spring.
Have a great start to the new week-
For the cake base I used this recipe:
Cake Filling recipe:
Ingredients for cake base (x2)
3 eggs
1dl sugar
1/2 teaspoon baking powder
1 dl + 1 1/2 tbs flour
1 tablespoons vanilla powder
1/2 tablespoons cardamom
* oil for lining the cake tine / milk when assembling the cake
Cake Base Directions
Baking the cake layers:
In a bowl, add together the dry ingredients (minus sugar). In another bowl, whisk together the eggs and sugar until light and fluffy with the help of an electric whisk. Through a sieve, combine the dry ingredients to the egg/sugar mixture. Gently fold the batter together.
Pour some oil into the cake tin so the bottom and sides are coated, pour excess out. Pour batter into the cake tin and place into the bottom part of the oven for 40 minutes at 175 °C. Check the cake by inserting a tooth pick into the centre and if it comes out clear, it is fully cooked. Cool in cake tins on a heat rack (about 10 minutes); remove cakes from tins and cool completely on wire racks for about an hour.
Repeat this process again for 2 cake layers.


Easter Escape to the Countryside
Our days were filled with the exhilaration of gliding gracefully on ice, immersing ourselves in the great outdoors, creating delectable culinary delights, and indulging in leisurely sessions of soothing saunas. Mornings were a symphony of shared coffee moments nestled in the warmth of our bed, while afternoons unfolded with seafood feasts, cooked over an open flame on the serene, frozen lake. As the snow bids its farewell, we eagerly anticipate the arrival of spring and summer, brimming with anticipation for new adventures and vibrant experiences.


Our days were filled with the exhilaration of gliding gracefully on ice, immersing ourselves in the great outdoors, creating delectable culinary delights, and indulging in leisurely sessions of soothing saunas. Mornings were a symphony of shared coffee moments nestled in the warmth of our bed, while afternoons unfolded with seafood feasts, cooked over an open flame on the serene, frozen lake. As the snow bids its farewell, we eagerly anticipate the arrival of spring and summer, brimming with anticipation for new adventures and vibrant experiences.


Cherry Blossoms in May
And then all of a sudden, it was cherry blossom season…

And then all of a sudden, it was cherry blossom season…
Summer came in an instant, where the sun blessed us with its warm rays and amazing heat wave. Just last week the weather was 3 degrees and rainy and today, it is +25 degrees and clear blue skies. Our morning began under the beauty of cherry blossom trees that opened up to bloom today. The sweet aromatic smell of cherry flower and the fleeting nature of life, the short-lived trees are just as stunning, every year. The pale pink trees take over the entire park, where we enjoyed our morning coffee amongst the singing of the birds.


Citrus Pavlova & Apple Blossoms
Apple Blossom Season is here to bring us joy from its speckles of white delicate flowers that light up the path of May. We took an evening route to our favorite apple orchard that are just bursting into bloom to capture a few memories as we do every year. Last year I was still able to lift Siena in my lap for some pictures but not anymore, she was outgrown in size for that already. Back home for the sake of the weekend, I decided to make a citrus pavlova for dessert. In this tiny elegant dessert, a crisp white meringue layer is filled with lemon infused whipped cream and decorated with little flowers.


‘A weekend filled with blooming apple trees & a beautiful cloud-like citrus pavlova´
Apple Blossom Season is here to bring us joy from its speckles of white delicate flowers that light up the path of May. We took an evening route to our favorite apple orchard that are just bursting into bloom to capture a few memories as we do every year. Last year I was still able to lift Siena in my lap for some pictures but not anymore, she was outgrown in size for that already. Back home for the sake of the weekend, I decided to make a citrus pavlova for dessert. In this tiny elegant dessert, a crisp white meringue layer is filled with lemon infused whipped cream and decorated with little flowers.
I’ve learned that to keep your meringue from being flat, do not overbeat as this loses volume when other ingredients are added to the mixture. The key is to beat the whites stiff but not dry. Also, slowly fold in the sugar rather than dumping it all at a fast rate. Then beat into a thick white glossy mass. Make sure no yolks or grease gets into your whites, as this ruins the pavlova.
Base Ingredients
4 egg whites
1 cup sugar
1 teaspoon vanilla extract
2 teaspoons cornstarch
1 teaspoon of lemon juice
Topping Ingredients
1 cup heavy cream
1-2 teaspoons of lemon juice
Zest of 1 lemon
About 2 tablespoons of sugar
Directions
Preheat the oven to 100 degrees Celsius (200 Fahrenheit) and adjust the rack to the lower part of the oven. Line a baking sheet with parchment paper. In a large bowl, beat egg whites until stiff but not dry. Slowly add in the sugar while continuously beating with an electric whisk. Beat until thick and glossy. Gently fold in the vanilla extract, lemon juice and cornstarch.
Spoon the mixture on the parchment paper and shape into a circle. You can make a larger flatter version or smaller and a taller version. However, keep in mind that if you are making a taller version, it cannot take any heavy filling on top as falls through the lightness of the pavlova.
Ready to bake: Bake for 1 hour and 30 minutes. Once ready turn the oven off and leave in the hot oven (with the door slightly open) and leave in for a remaining hour. It is in this hour that the meringue will dry out completely. Then remove from oven onto a wire rack and allow to cool.
While the meringue is cooling whip the topping: Whip some cream with the sugar. Once stiff, add lemon juice and lemon zest. Once the meringue is cool add the whipped cream on top. To decorate, add a little bit more lemon zest and little flowers on top.


Apricot Cream cheese Toast
As the summer season comes to an end, the waves at our summer house start to get stronger with the breeze of a gentle autumn wind. The weather however, is still warm enough to enjoy breakfast outside and those little chills are warmed up by some piping hot espresso. One of my favorite spots at our summer house is in the empty woods in our garden where the hay is overgrown and wildflowers come and go as they please.

‘Apricot toast on a bed of grass’
As the summer season comes to an end, the waves at our summer house start to get stronger with the breeze of a gentle autumn wind. The weather however, is still warm enough to enjoy breakfast outside and those little chills are warmed up by some piping hot espresso. One of my favorite spots at our summer house is in the empty woods in our garden where the hay is overgrown and wildflowers come and go as they please. Not only is it home to the most gorgeous porcini mushrooms, but it also inhabits so many birds that are a blessing to listen to. A collection of rocks and sand makes up the bordering of the water making it a cozy little spot to enjoy a picnic. This morning I gently caramelized halved apricots in honey, thyme and butter with a pinch of cardamum, maybe for about five minutes or so. I let them get a bit mushy and spread them on top of some toasted rustic sourdough bread that was smeared with cream cheese. To balance the sweetness, I squeezed a bit of lemon juice on top and added a few eatable flowers on top as we happen to have some growing on our porch. As our Bialetti espresso stove cooker came to a boil, I put everything into a little basket and headed out to enjoy these last warmer moments that will keep me going through out the darker autumn. Accompanied by Siena, we sat and listening to nature around us watching the waves crash against the lakes near us.


Midsummer Treats
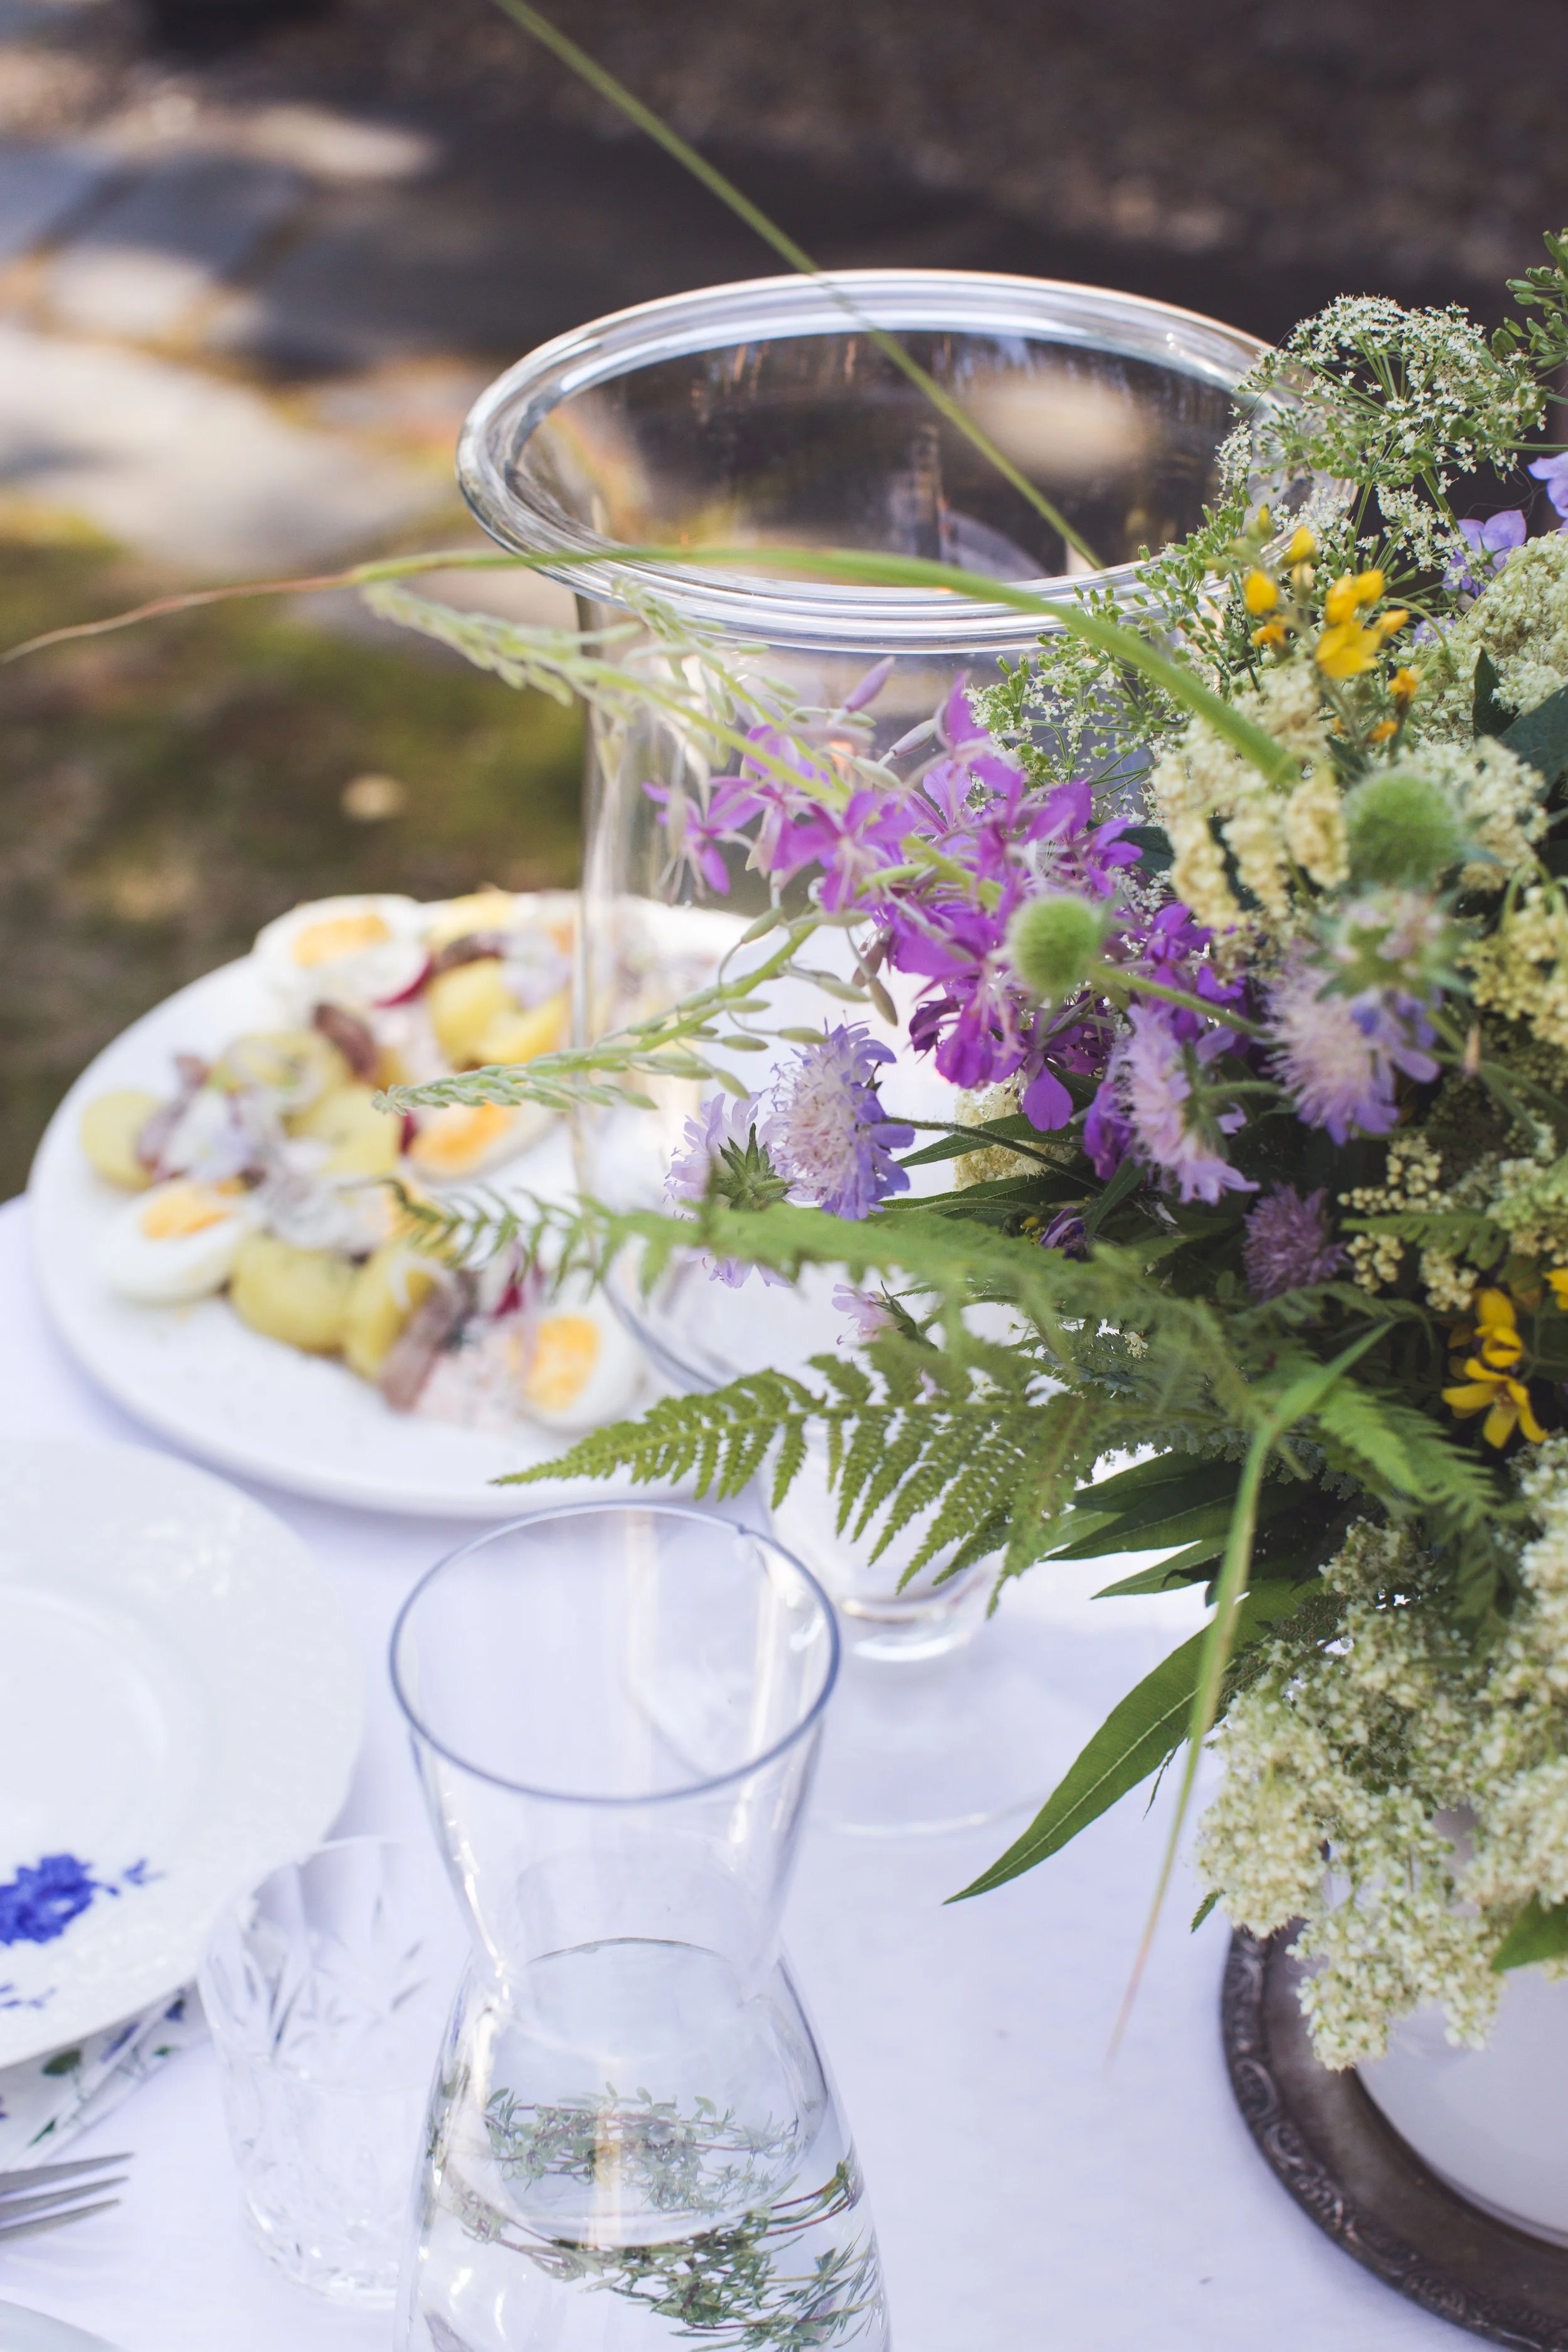
We took our little wooden boat ’Wilhelmina’ out on the day of midsummers eve. The day was hot and humid and people had anchored their boats in the middle of the waters to swim in the sea and soak in the beautiful summer weather. The waters were peaceful and quiet, a few dressed up boats passed us by, with celebratory flags on the sails and flowers or birch trees on row boats to show appreciation for summer solstice.

We took our little wooden boat ’Wilhelmina’ out on the day of midsummers eve. The day was hot and humid and people had anchored their boats in the middle of the waters to swim in the sea and soak in the beautiful summer weather. The waters were peaceful and quiet, a few dressed up boats passed us by, with celebratory flags on the sails and flowers or birch trees on row boats to show appreciation for summer solstice. Most people have migrated to the countryside but we will only be going there next week as my hubby’s holiday starts then. We keep the boat on our new property, where building will take in a few years’ time. It took a good year for us to design the house and apparently receiving the permit from the city can take up to a year in this specific area. However, it still feels rather dreamy that we will have our own beach and waterfront views and boating will become that much easier.
Today is midsummers day, and we started the day with breakfast on the balcony surrounded by all the growing flowers that have really appreciated all the daily warmth. I received these peonies from my hubby yesterday and I just cannot get over how beautiful and many there are. Their aromatic perfume takes over any space they are in, giving the air that wonderful summer fragrance. Today is another peaceful day, time spent outdoors in the midst of nature.


Vendace (muikku in Finnish) or also known as the European cisco, is a freshwater whitefish that is found in Northern European lakes, such as in Finland, Sweden, Russia, Latvia and some lakes in Norway. It is a small fish, almost sardine-like that is commonly fried or smoked when eaten. The roe of Vendace is a real delicacy in Finland as is often eaten during Christmas time.
The lakes by our summer house are known for the muikku- fish and you can see locals pulling up fish nets from their boats right from our pier. To make this dish, you can also use other smoked fish such as salmon or sardines or whatever you have in the region you live. You can buy pre-smoked fish or smoke it yourself if you have the facilities for doing so. We have a smoker at the country house, so my father smoked the Vendace with juniper branches for some additional flavor. Cooked vendace is delicate and flakey, mild but delicious.
Meanwhile to make the salad, begin by marinating some red onion. Finely chop some onion slices and place into a bowl that fills with lemon juice. Leave them to soak in there for a good hour at least.
For the base of the salad, slice about 5 oranges and spread them on a plate. Add some capers, spring onion and finely chopped dill on top. Then add your smoked fish on top by flaking it into smaller pieces. Add lots of black pepper and lastly, add some of the marinated red onions on top. Also pour some of the lemon juice the onion has soaked in that has turned a vibrant pink color. Add a gently drizzle of olive oil and a sprinkle of maldon salt.
To accompany the salad, I had a smoked salmon mousse bread for some additional carbohydrates. Basically, toast some sourdough bread, add some salmon mousse on top, fresh peas, some of the marinated red onion, black pepper and dill.
salmon mousse
To make the salmon mousse, you need some smoked salmon. We smoked the salmon ourselves in a smoker with juniper branches and let it completely cool down. However, you can just as easily buy a medium size piece of smoked salmon from the store. Once cool, mush the salmon with a fork into a bowl. Add about 1 cup of some crème fraiche, a couple of tablespoons of aioli, lemon juice and white pepper. Mix well so it becomes a mush. Check for seasoning.
I love the consistency and flavors of this salad. The juicy oranges give a lot of moisture and sweetness that balances out the capers and red onion. The delicate white fish adds a new dimension of smokiness to the dish, making it a lovely refreshing summer salad. Meanwhile, the creamy salmon mouse toast adds an extra comfort that easily works well in so many other occasions. You can serve the mousse as an appetizer on canapes at a party or in form of a tartar on top of avocado for example.


Simple Scandinavian beauty on a plate
Lunches al fresco are what slow summer days are made out of. These warm days have been something like no other and we try to each lunch in a little bit of shade, if possible. I love this spot at our country house, that is in the front of the house surrounded by woodland and the life in the old tall trees. Since we just approached crayfish season yesterday and August is around the corner, I thought this recipe is worth sharing if any of you are planning on having garden parties any time soon. This plate would make a beautiful side dish for crayfish to compliment the Nordic theme.

A beautiful plate of Scandinavia
Lunches al fresco are what slow summer days are made out of. These warm days have been something like no other and we try to each lunch in a little bit of shade, if possible. I love this spot at our country house, that is in the front of the house surrounded by woodland and the life in the old tall trees. Since we just approached crayfish season yesterday and August is around the corner, I thought this recipe is worth sharing if any of you are planning on having garden parties any time soon. This plate would make a beautiful side dish for crayfish to compliment the Nordic theme.
For other than Scandinavians, this dish may be an acquired taste. The beautiful thing about it however, is that you can alter it to your liking, for example by leaving out the herring completely. The plate is made to look like a crown and is decorated with eatable flowers and summers delights. You make the base of the crown with boiled new potatoes and eggs and add dollops of homemade salmon mousse. Then you basically add any seasonal produce you find at a farmer’s market, like peas, sweet summer onions and radish. Then you add some herring on top and sprinkle some dill and black pepper in the end. Lastly add some eatable flowers.
Easy Salmon Mousse
To make the salmon mousse, you need some smoked salmon. We smoked the salmon ourselves in a smoker with juniper branches and let it completely cool down. However, you can just as easily buy a medium size piece of smoked salmon from the store. Once cool, mush the salmon with a fork into a bowl. Add about 1 cup of some crème fraiche, a couple of tablespoons of aioli, lemon juice and white pepper. Mix well so it becomes a mush. Check for seasoning.


Wild Flowers & Peace of mind


Just be silent and listen… So many of us are overwhelmed with anxiety and worry. Sometimes we just need to sit still and listen, remember what is important in life. Maybe because being in nature is such a big part of Finnish people’s lives, as we are taught this already at a young age, it becomes part of routine even in adulthood. It is known that nature can generate different types of positive emotions, such as calmness, creativity, joy and improve concentration. I can imagine that during the pandemic, spending time outdoors has been one of the key factors enabling people to cope with the stress.
That is why I love the feeling of being at the countryside, as you are constantly surrounded with woodland and water, breathing in the fresh air and soaking in all the goodness from outdoors. You feel it in your lungs and heart. It makes me feel better emotionally and clearly contributes to my physical wellbeing. It is also known to reduce blood pressure, heart rate, muscle tension, and the production of stress hormones. So, I cannot stress enough, but to encourage you to spend time outdoors, may it be in a park, forest or by the sea to clear your mind. At this current moment in time, I feel like I have a sense of peace of mind.
Still in my linen pj’s, I’ve made myself a frothy decaf cappuccino and walked down to the lake to dip my feet in the cooling waters. It’s only morning but the weather is already warm so it is nice to start the day by soaking my toes in the water. Siena always joins me no matter where I go, and together we gazed into the horizon as the day began to awake. That first sip of morning coffee is the best feeling in the world and pressing the tangy froth against my lips, while there is silence all around me, is a cleansing sensation. I think we sat here for twenty minutes or so, just reflecting on positivity around me and listening to the sounds from nature.
Our wonderful coffee moment by the pier was followed by a walk to the forest to pick some fresh wildflowers for the day. My mother loves flowers as much as I do, so we love to have flowers around us as much as possible. You can see how the sun sparkles through the trees that has not risen completely into the sky. A stone throw away, there’s a little meadow close to our cottage, that has old apple trees, an old barn and a little field filled with different flowers. Here you find bees and butterflies scattered in the long hay and it is the place to go pick some inspiration during different seasons. It’s funny when it comes to color, I prefer most neutral tones, but when it comes to flowers, I do appreciate some color. I picked some blooms into my basket while Siena lay hidden in the hay finding the joy in simple moments like these.


Countryside Breakfast Inspo
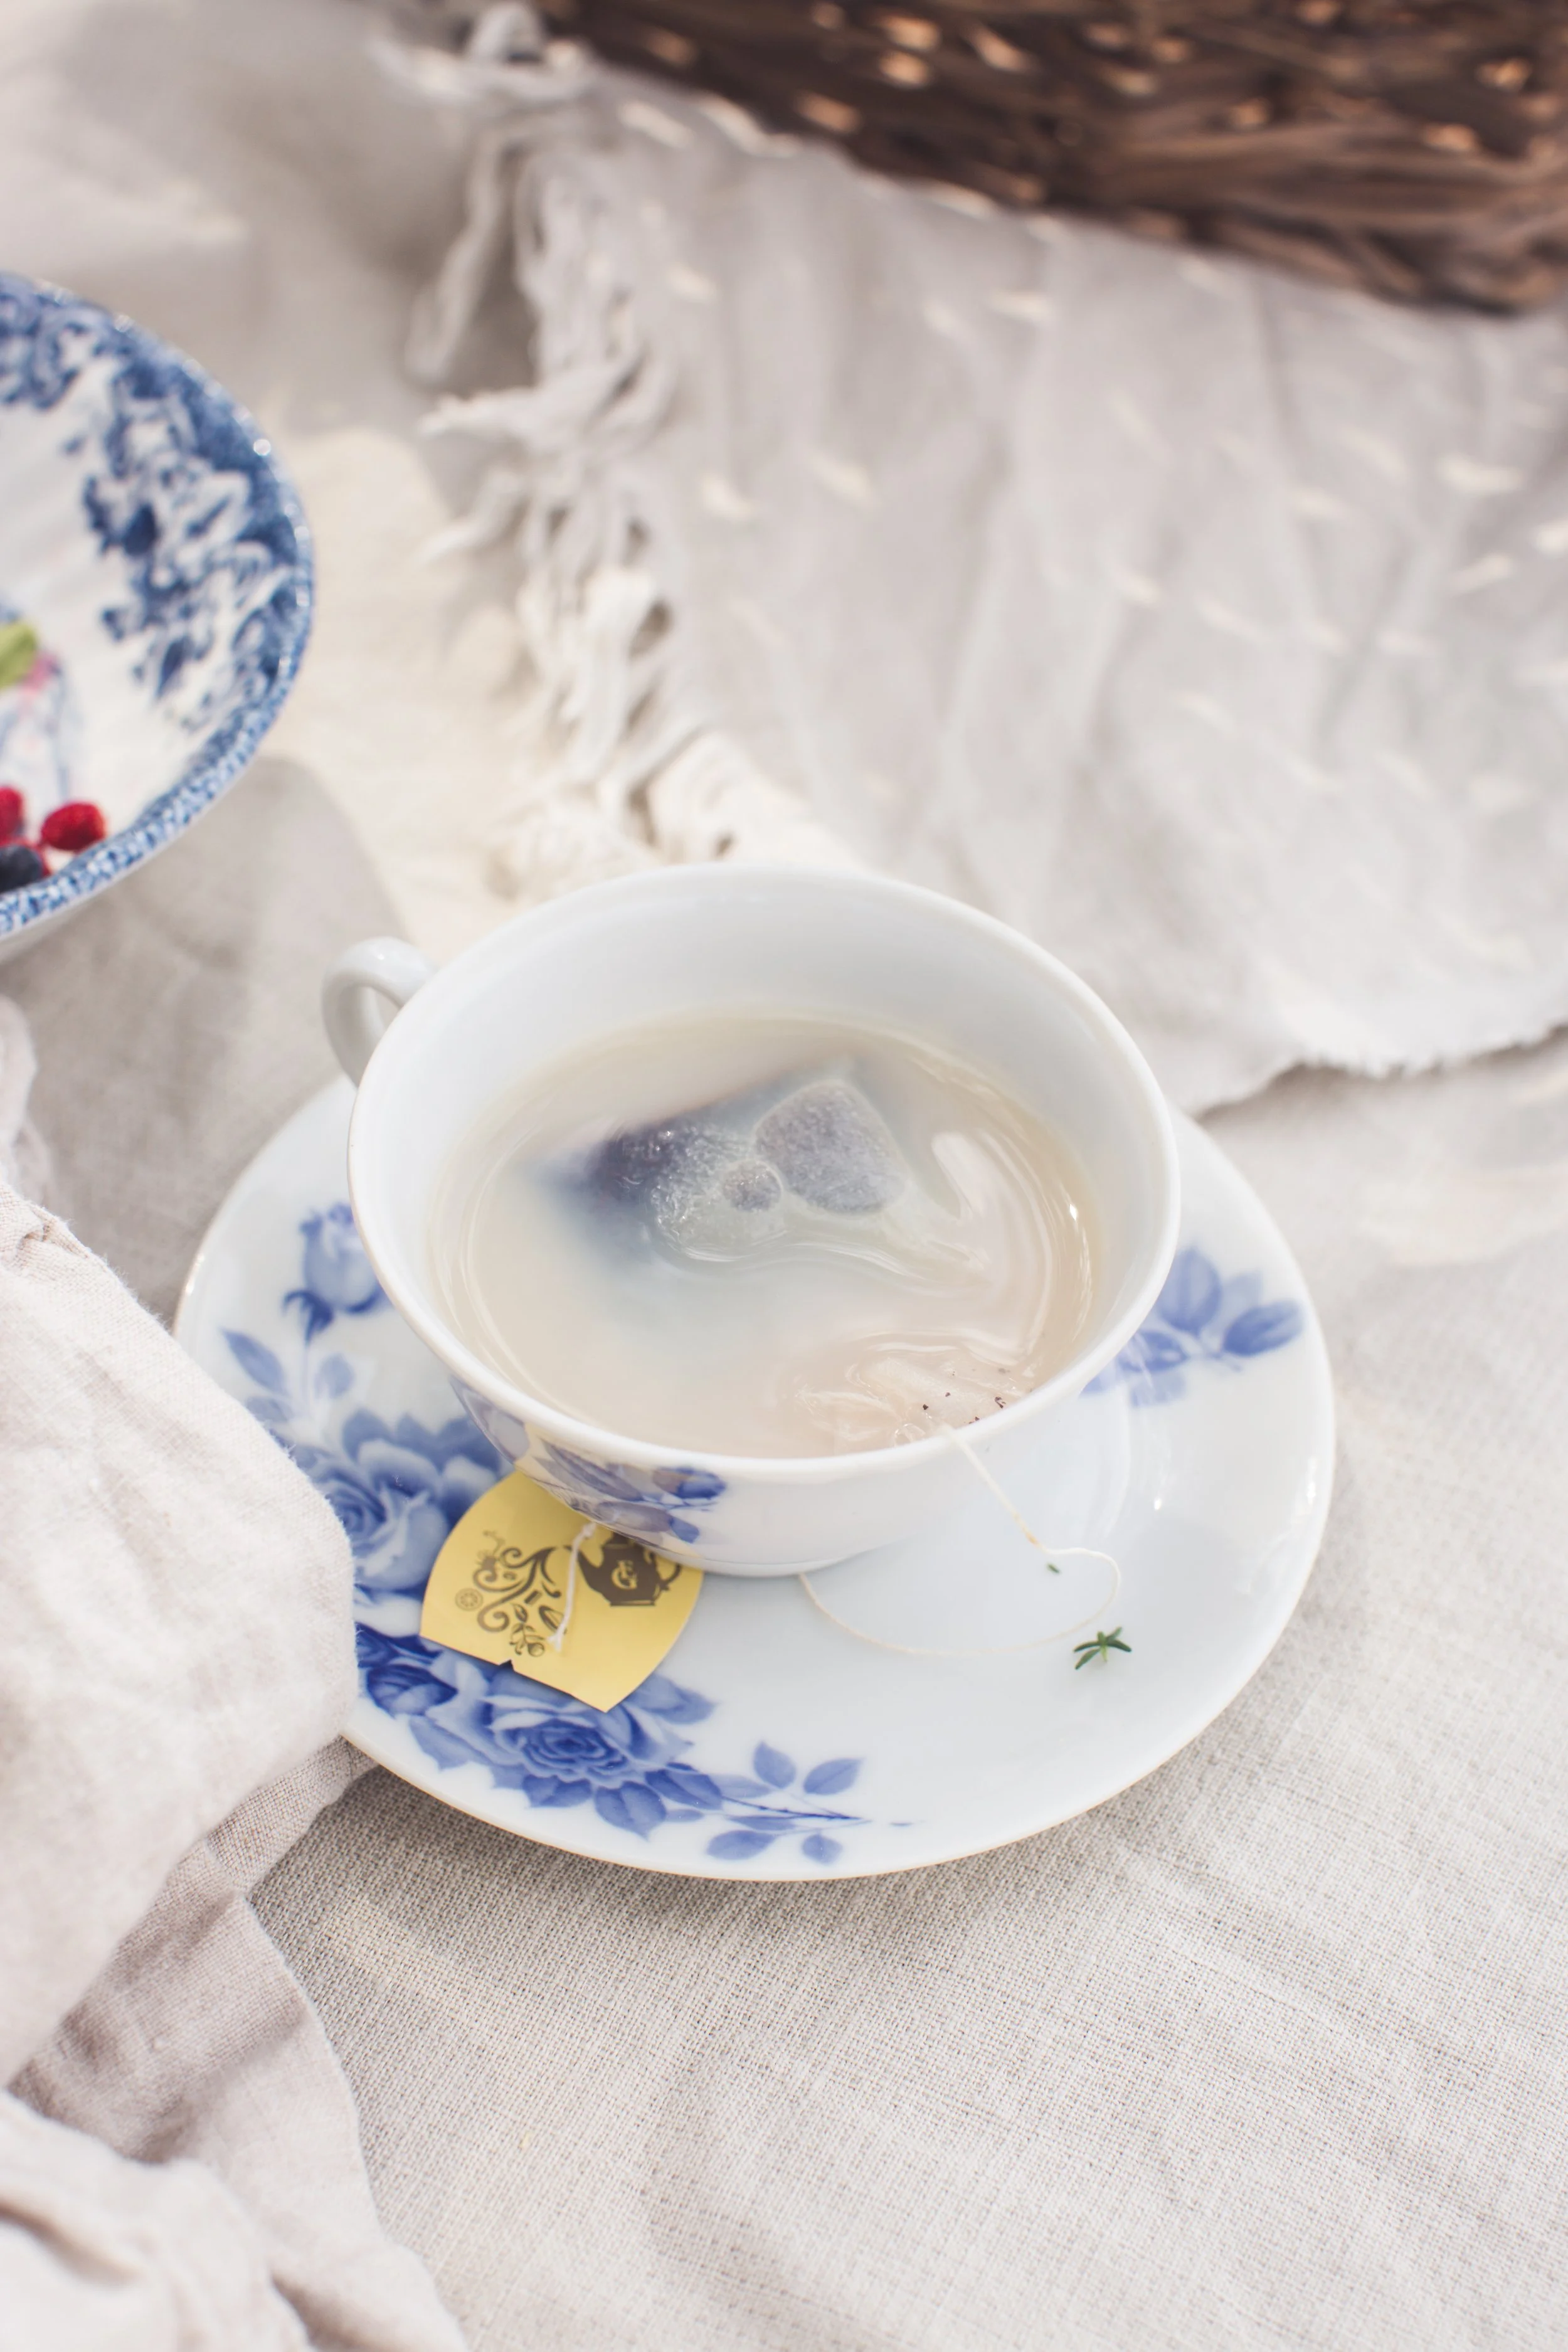
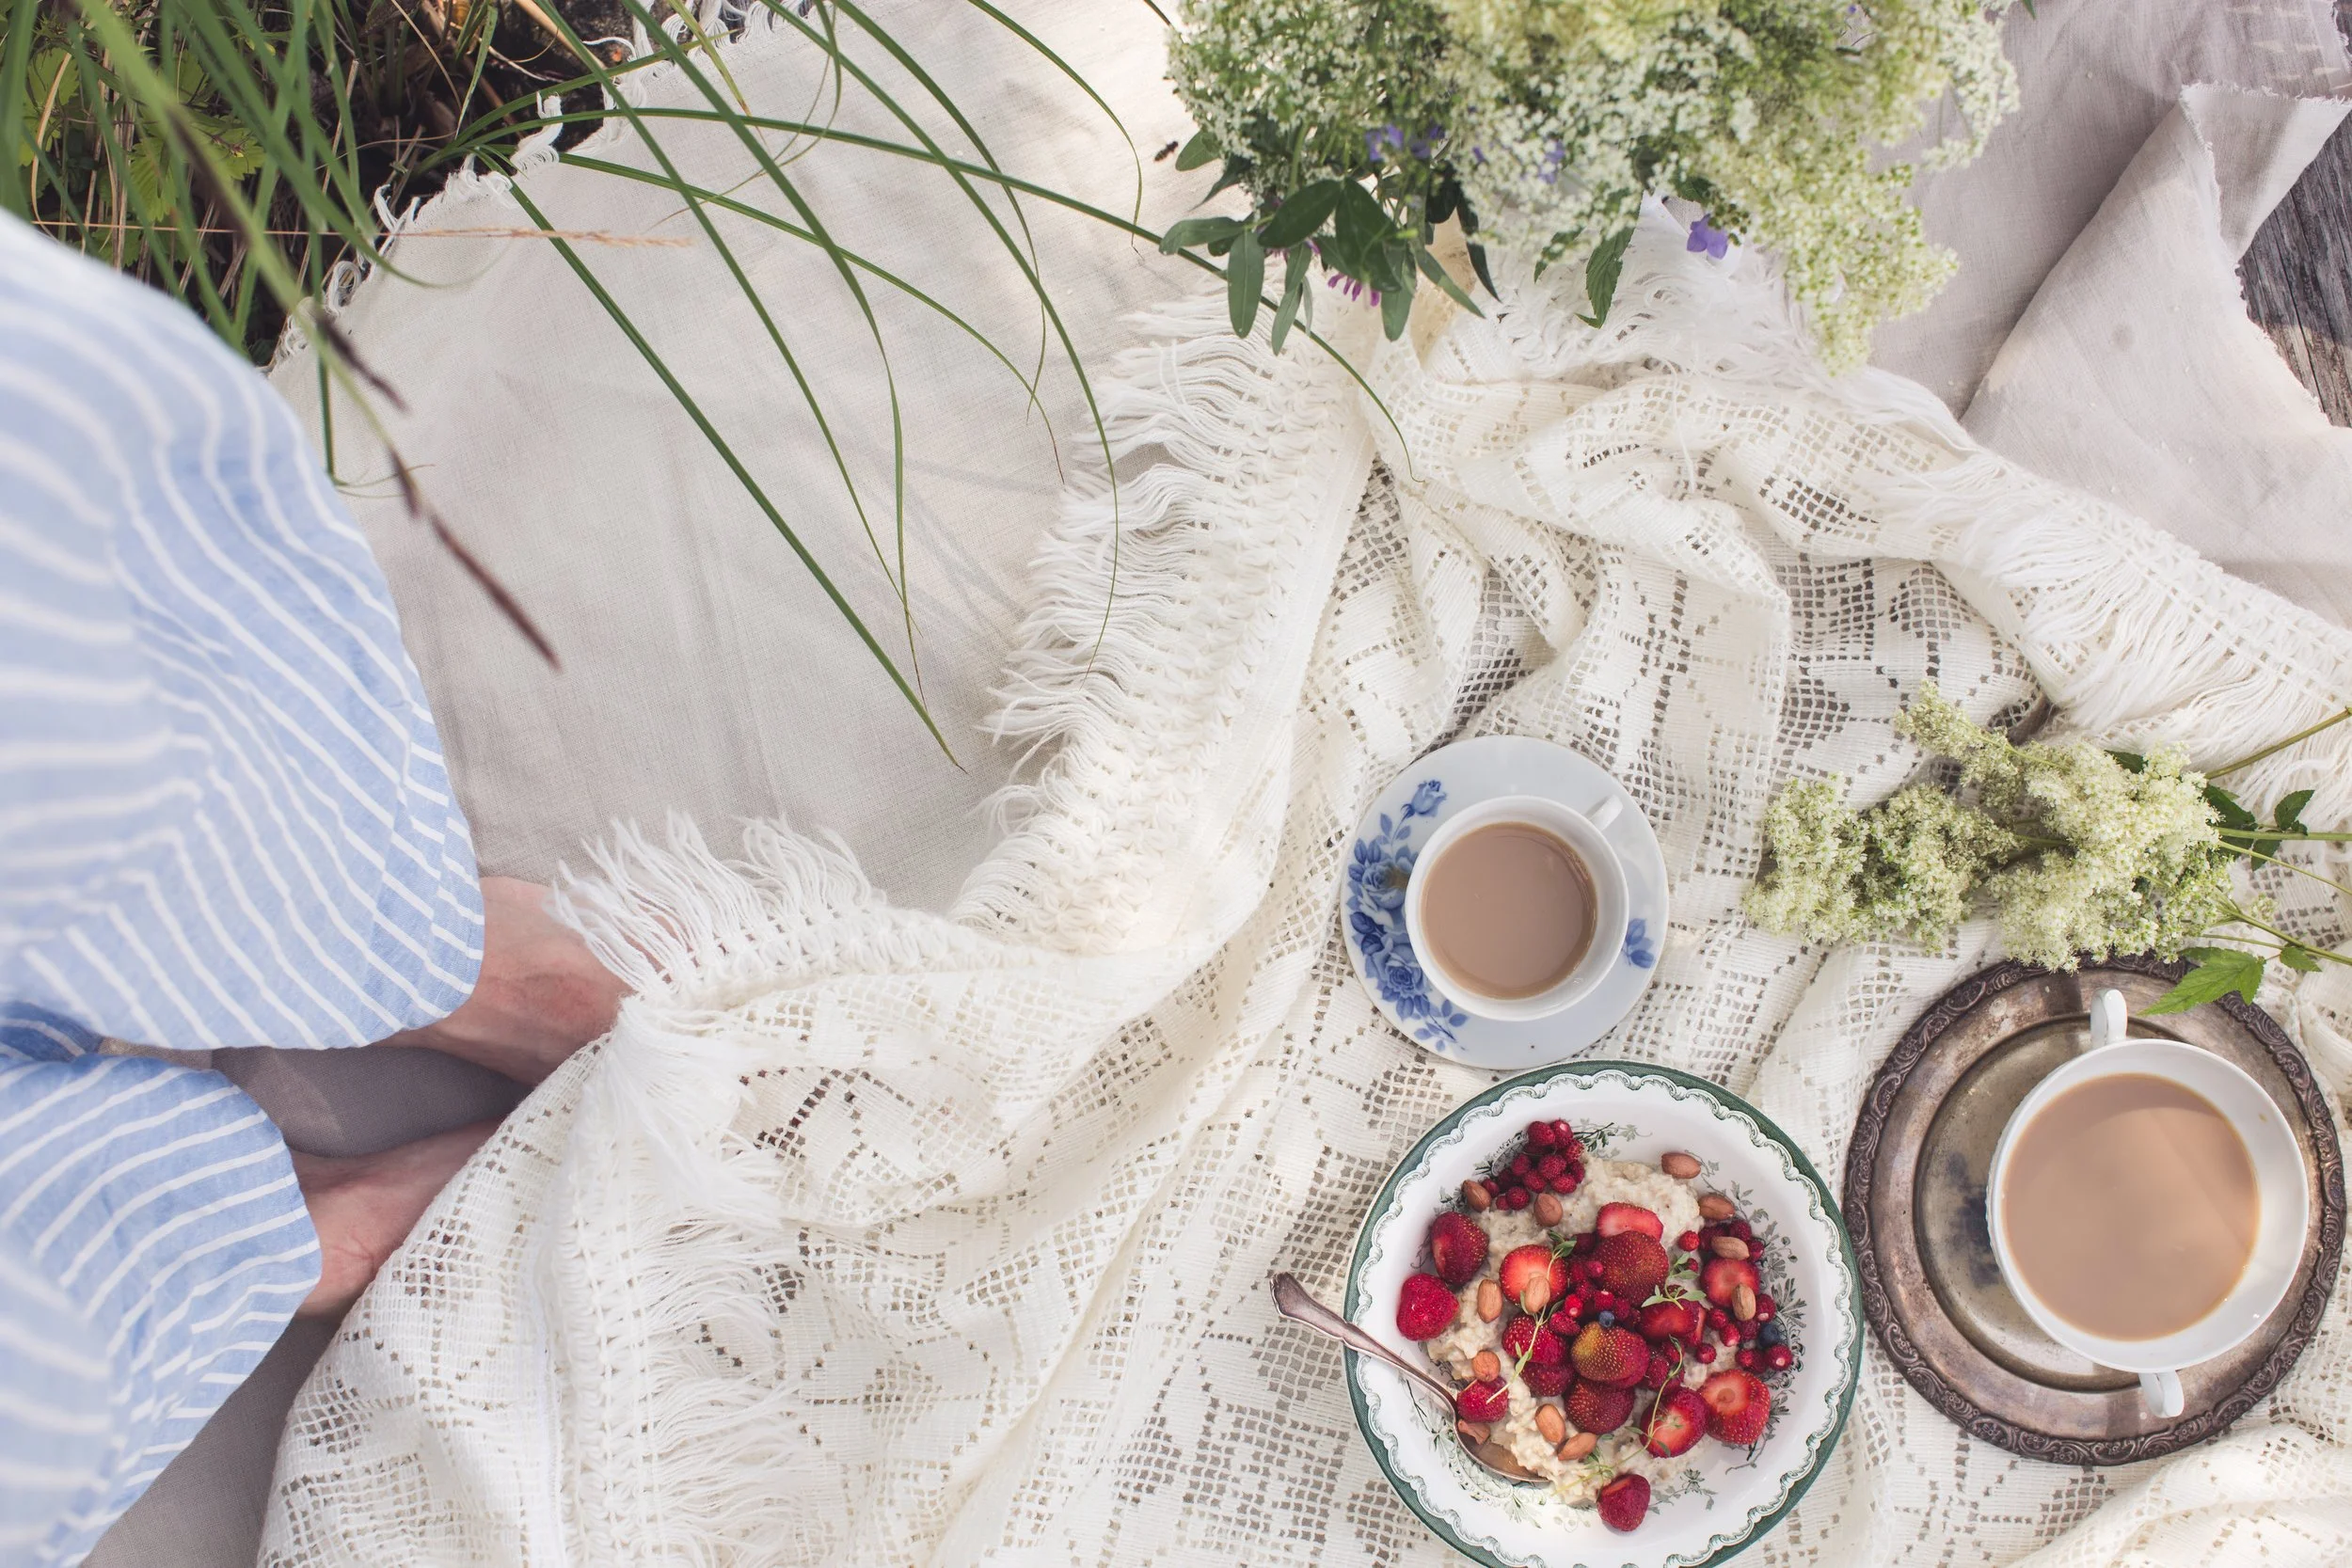
Morning swims, cups of coffee & comforting porridge bowls filled with fresh berries…is what summer mornings are made of. Hubby and I started the day with a traditional picnic breakfast on the pier. Siena and hubs swam while I sat on the softest of blankets watching them fight over noodles in the water. Even though the pictures might not reflect it, the weather was close to 30 degrees Celsius so you can imagine the lake was lovely and warm. According to my husband, there is nothing better than a refreshing swim and a hot cup of coffee afterwards, and I could not agree more.


Morning swims, cups of coffee & comforting porridge bowls filled with fresh berries…is what summer mornings are made of. Hubby and I started the day with a traditional picnic breakfast on the pier. Siena and hubs swam while I sat on the softest of blankets watching them fight over noodles in the water. Even though the pictures might not reflect it, the weather was close to 30 degrees Celsius so you can imagine the lake was lovely and warm. According to my husband, there is nothing better than a refreshing swim and a hot cup of coffee afterwards, and I could not agree more.

Wild Strawberry Toast
One of my favorite summer breakfasts at the country house is to eat a wild strawberry toast. The red little pearls grow around the garden so in the mornings, I tend to take a little bowl and pick some for my morning toast. During this early hour of the day, Siena takes her first stroll around the property, listening to sounds of nature around her. Usually everyone else is asleep and I’m enjoying the nature to myself picking away the sweet wild strawberries along with some blueberries. We have blueberries and lingonberry growing all over our forest, which is a common wild berry in Finland.
To make this delicious bread, you need to toast some rustic bread and let it cool. Spread a generous amount of cream cheese on top, squeeze a little bit of lemon juice and pour the berries on top. I usually garnish with a bit of thyme and it’s ready to be indulged. It really is a simple toast and maybe it tastes so delicious with the handpicked berries or the atmosphere I eat it in, but it really does remind me of the best of summer mornings. I boil my tea into a little thermos, take a few baskets with blankets and freshly picked flowers and stroll down to the pier to set up a little breakfast spot. I used to do this with our old dogo Bella, who always accompanied me where ever I went, so I’m glad Siena is learning to do the same thing. She swam in the lake as I sipped my tea and at that very moment, I felt grateful about life. The two little seagulls you see in the photos, are the same pair that always come back to our country house when we arrive there. They have almost become like pets to us, they walk all over our garden almost to the front door, sit silently waiting for a slice of bread. My mom feeds them on occasion, which is why they keep returning to us. They also joined us for breakfast, waiting at the end of the pier, for a little bit of bread. These Finnish lakes are so beautiful; they are clear, basically drinkable in this region which makes it such a refreshing experience to swim in them. A few boats glide by and the day begins to get hotter as the sun rises, as I finish my slow breakfast and cup of tea.


